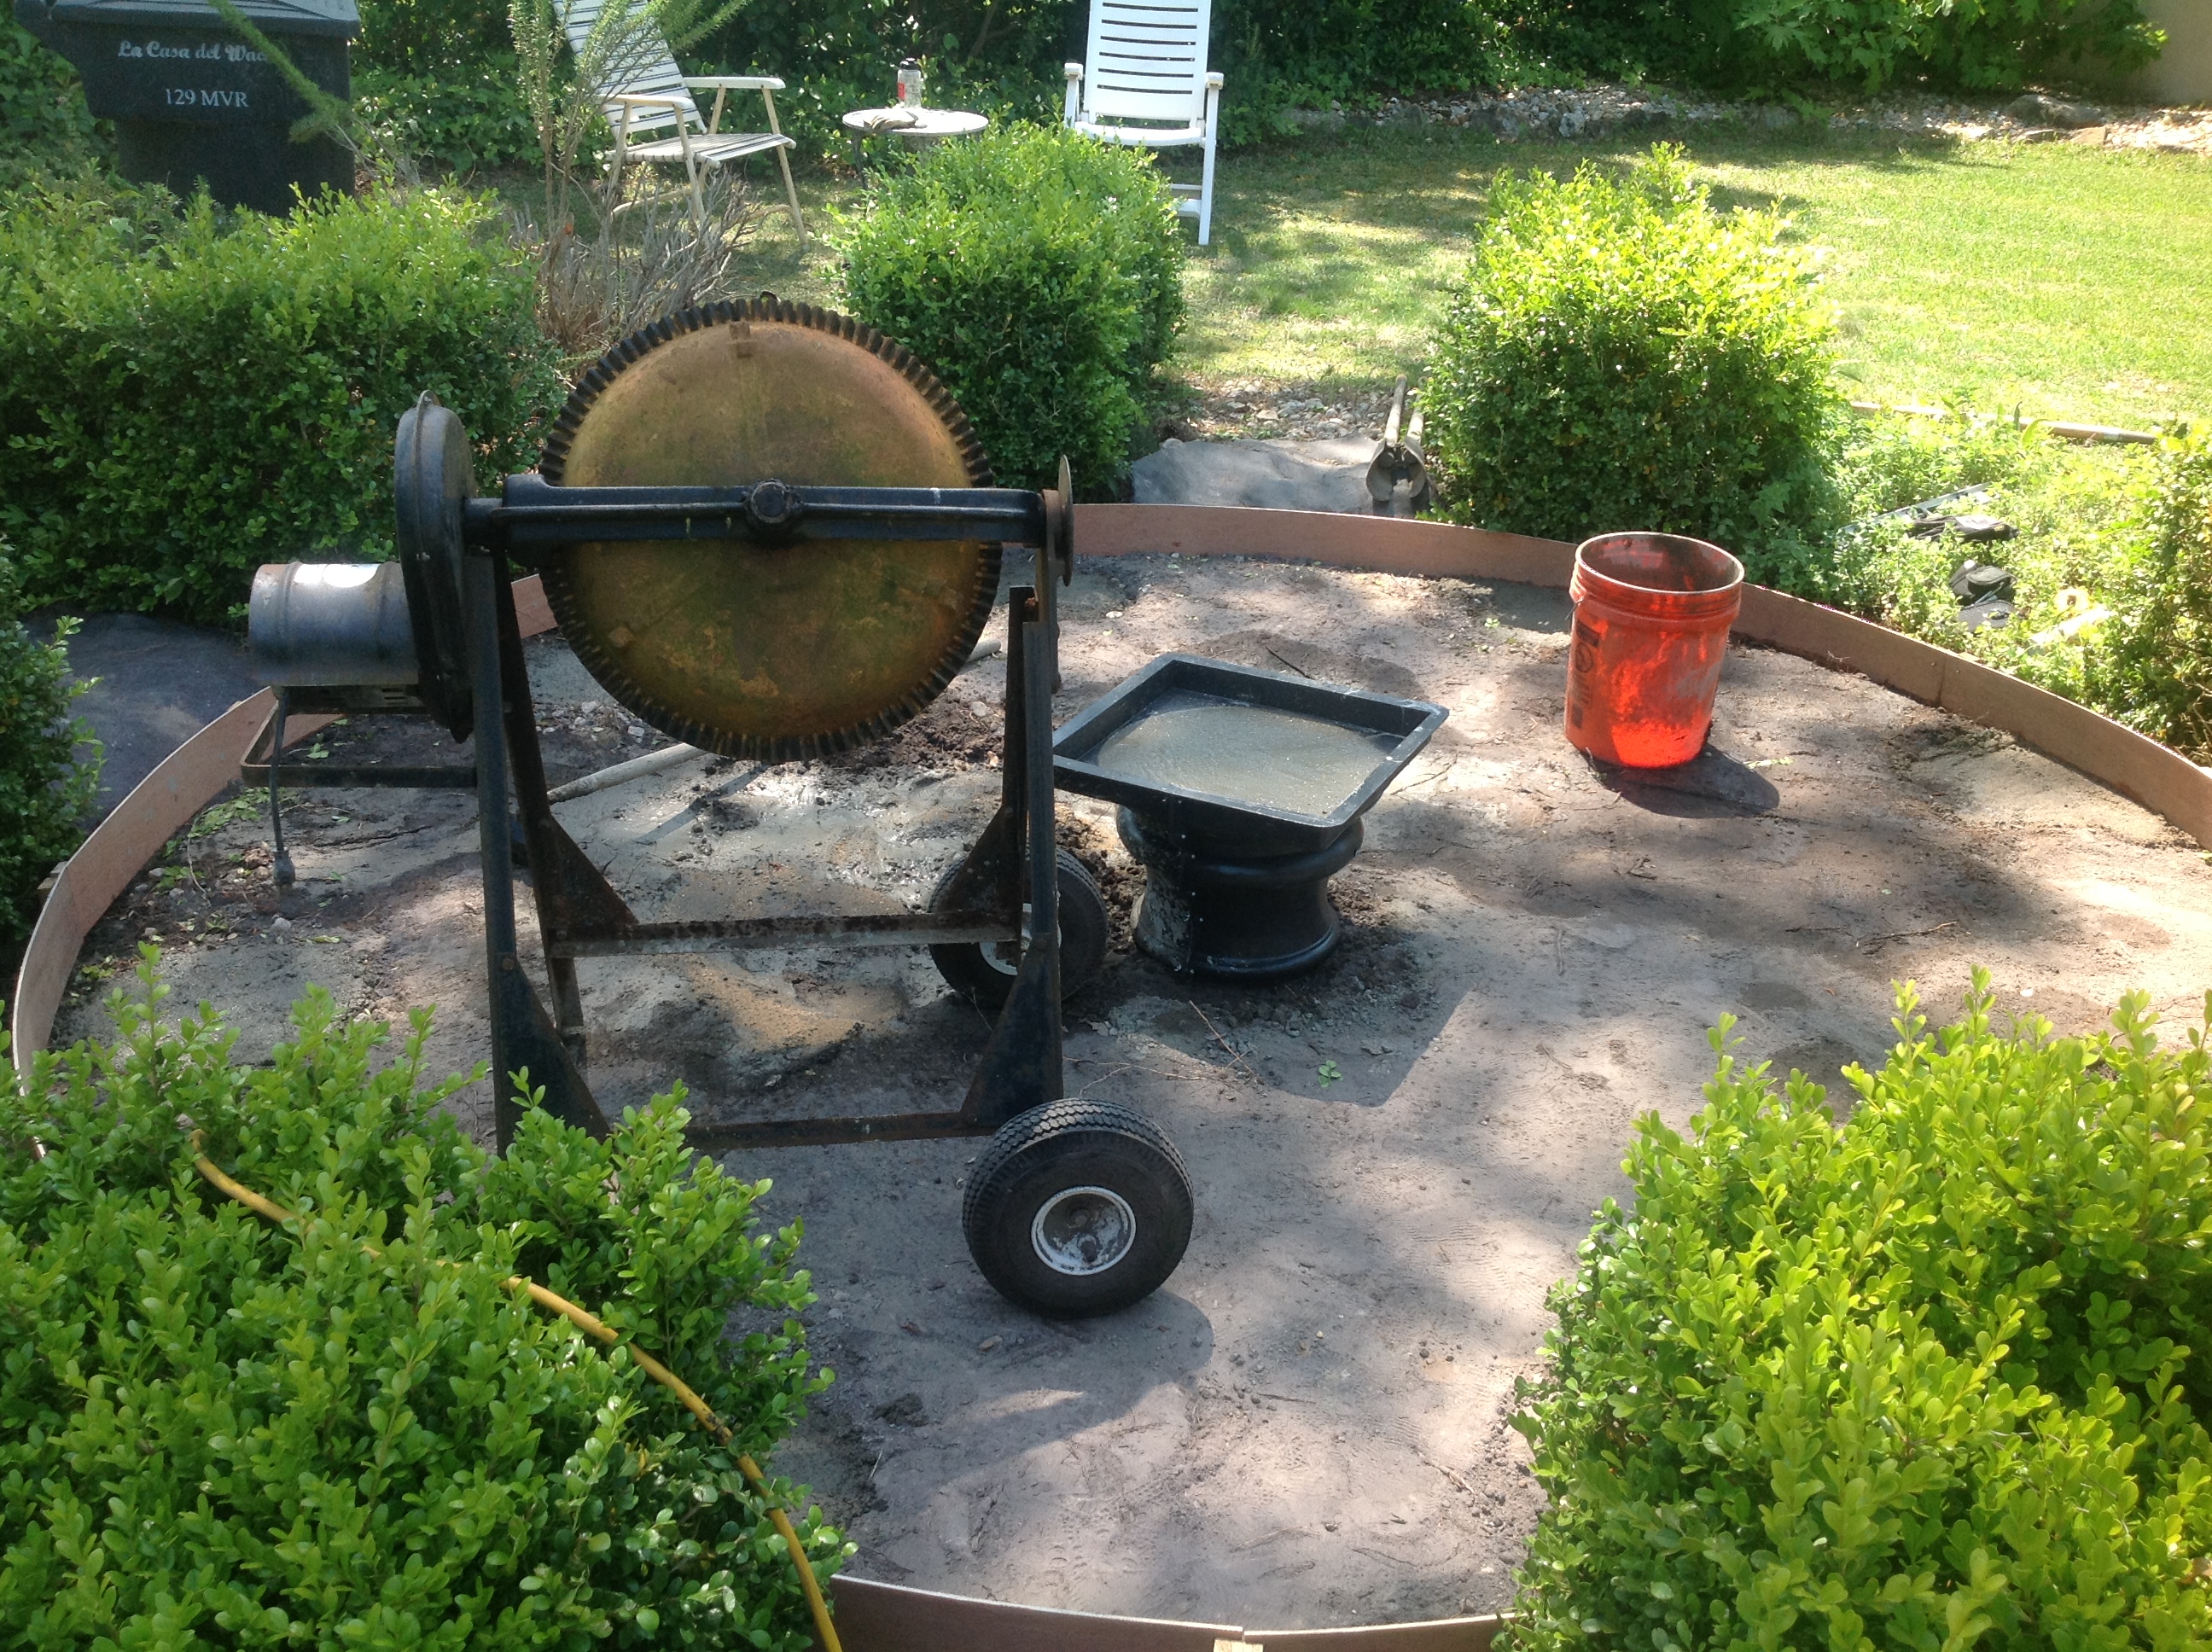
For the longest time we have wanted a Gazebo on our property. On the Southwest side of the house near the Agave garden was the herb garden which never did very well but we knew someday it would be the perfect place for a Gazebo. I had even planted American boxwoods so that there were four entances to the center. The diameter of this inner garden space was 12', an adequate size for a Gazebo. Often we have shopped for a stone, concrete or marble gazebo, but always the cost was just too much for our budget. This summer we decided that the time had come and we were up to the challenge. Having made all the concrete pavers in our courtyard and applying concrete stucco to the exterior walls of the house, we felt very comfortable building the gazebo using concrete. We found a mold for the caps and bases on line, used 10"pvc for the column mold, and then researched, constructed the positive, and made the latex negative for the headers. To finish the gazebo, Joani is going to design and install a glass mosaic floor, and I am going to fashion a copper openwork dome using a grape vine motif. Below you will see pictures of the progression of the construction and perhaps in the next year we can post the completion.
The beginning
The form for the pad, footers for the columns, and the first capital poured
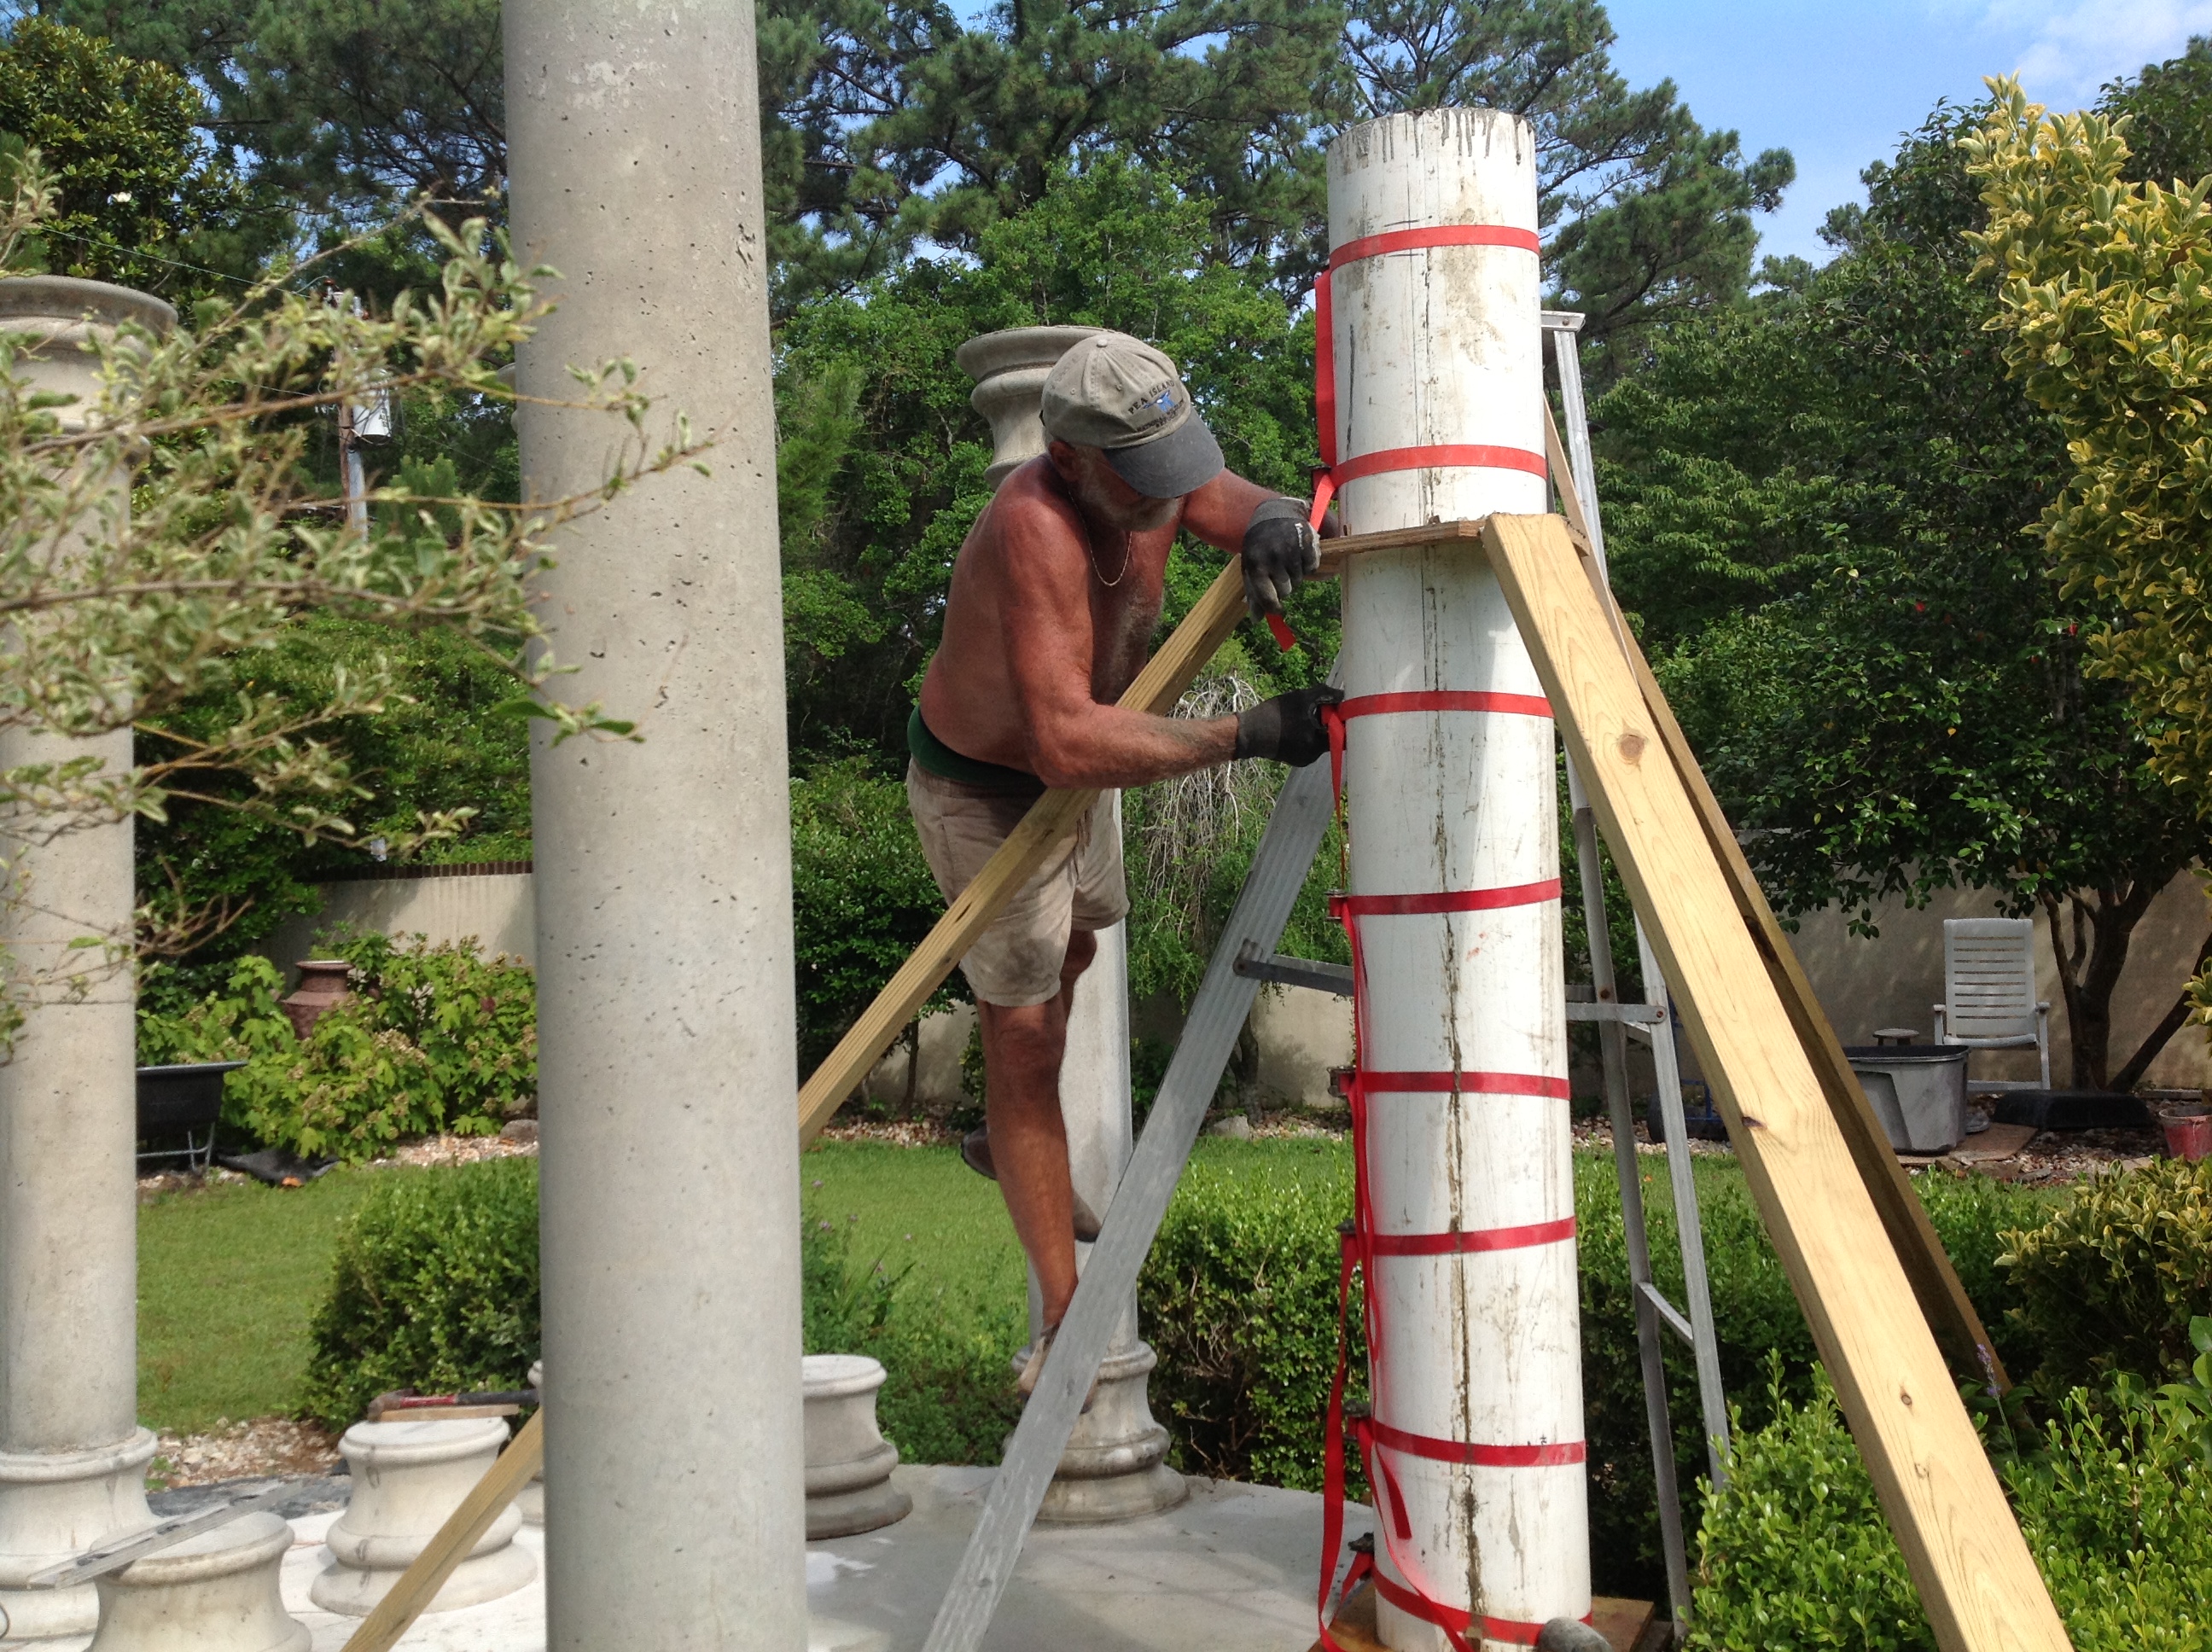
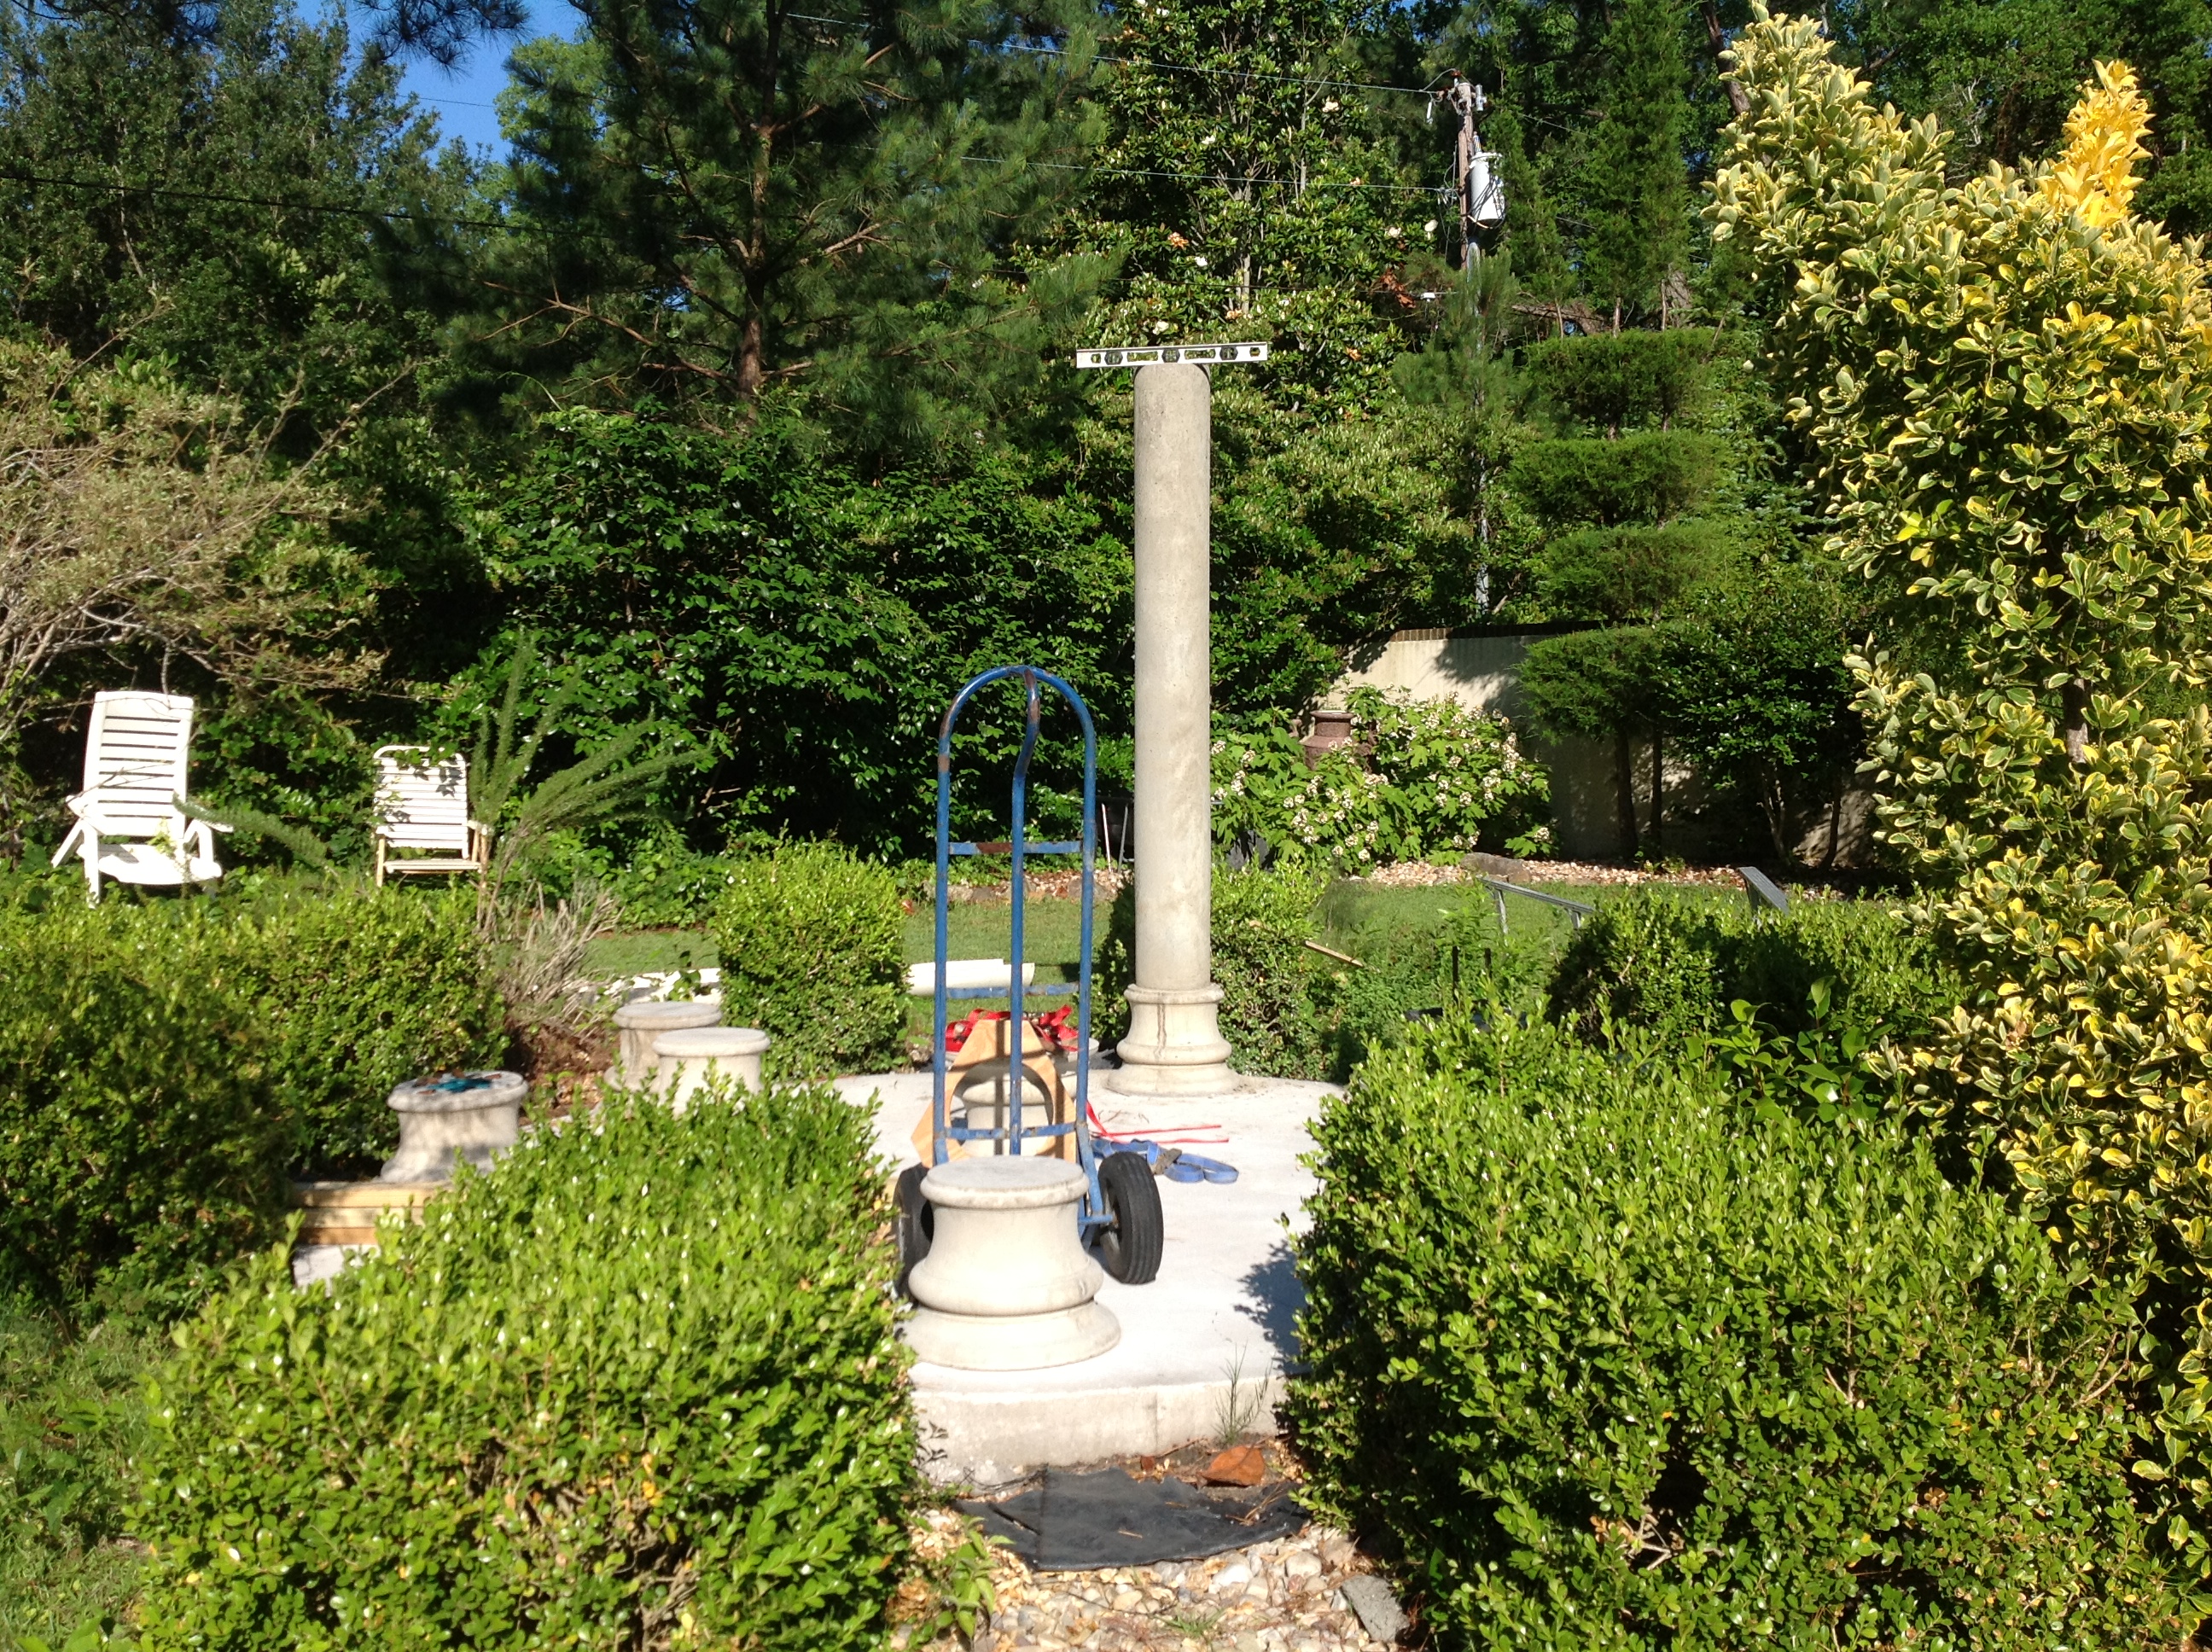
Creating columns
Each column was poured in place using a 10" PVC pipe as a mold. Rebar was placed inside and cement was poured bucket by bucket. The challange was keeping the columns verticle and plum. This tripod brace did the trick! It took 6 80lb. bags of concrete for each column and the weight of the concrete required the 8 ratchet straps to keep the mold together.
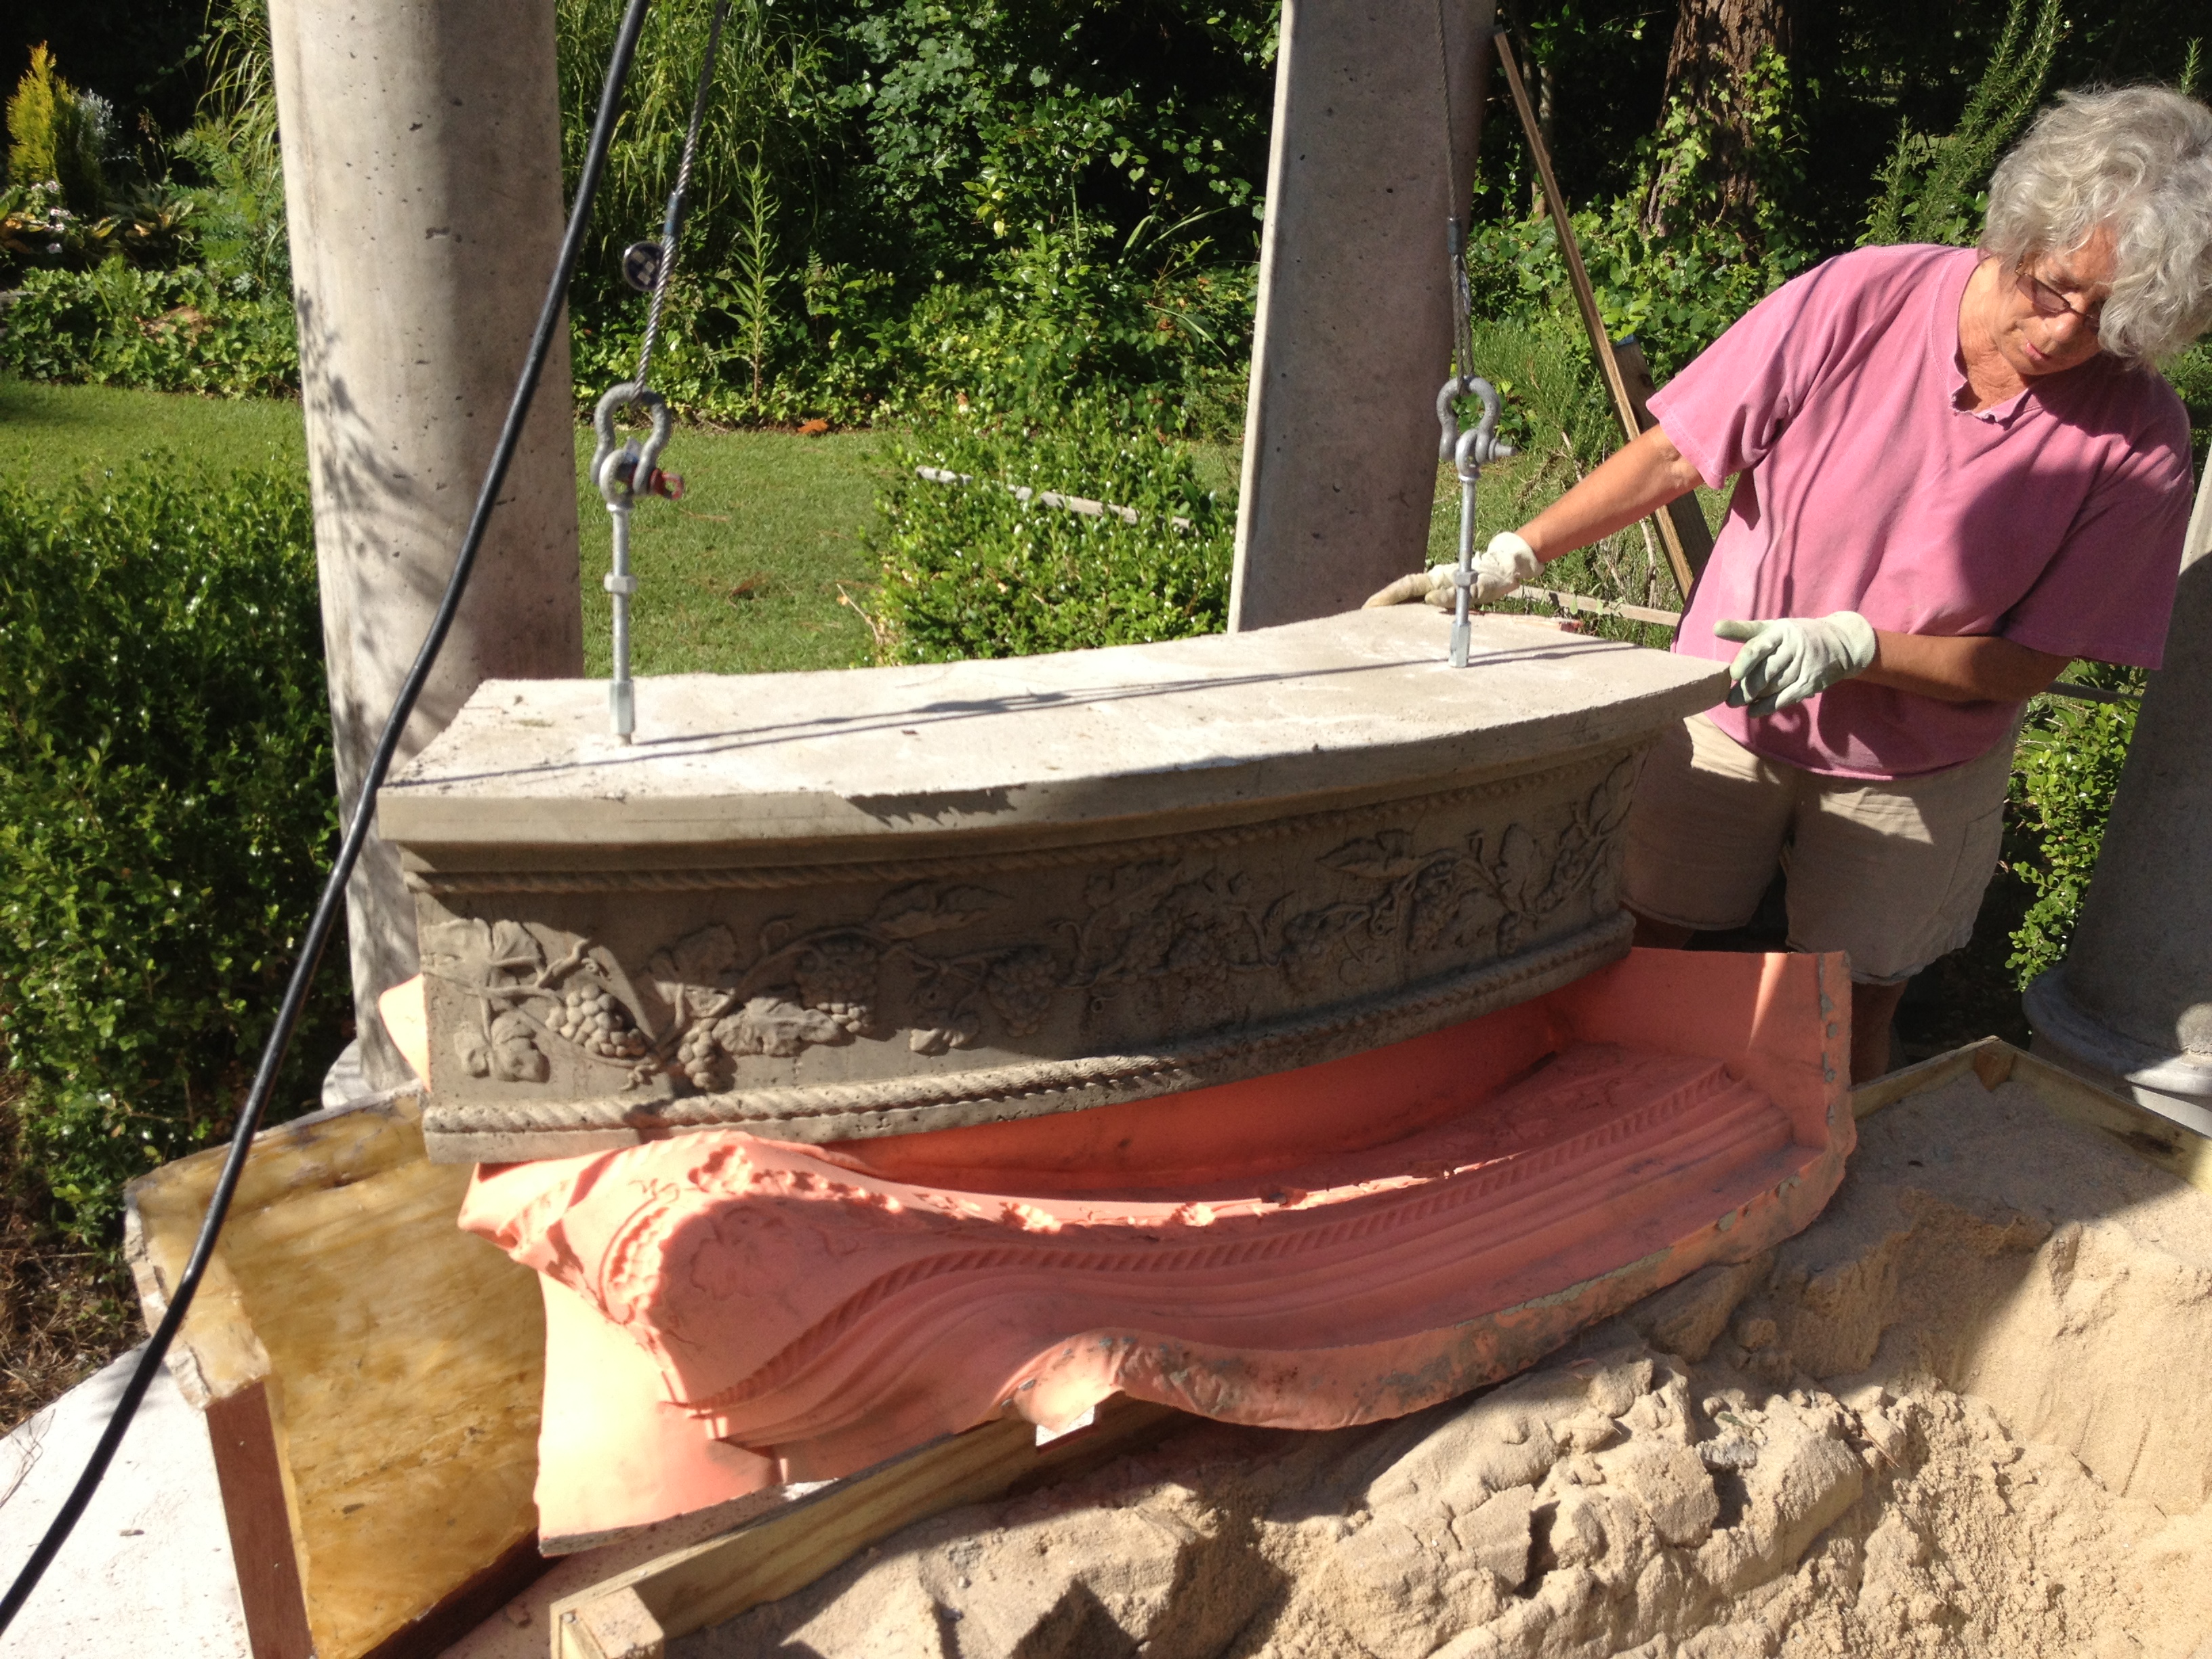
Creating the positive mold for the header
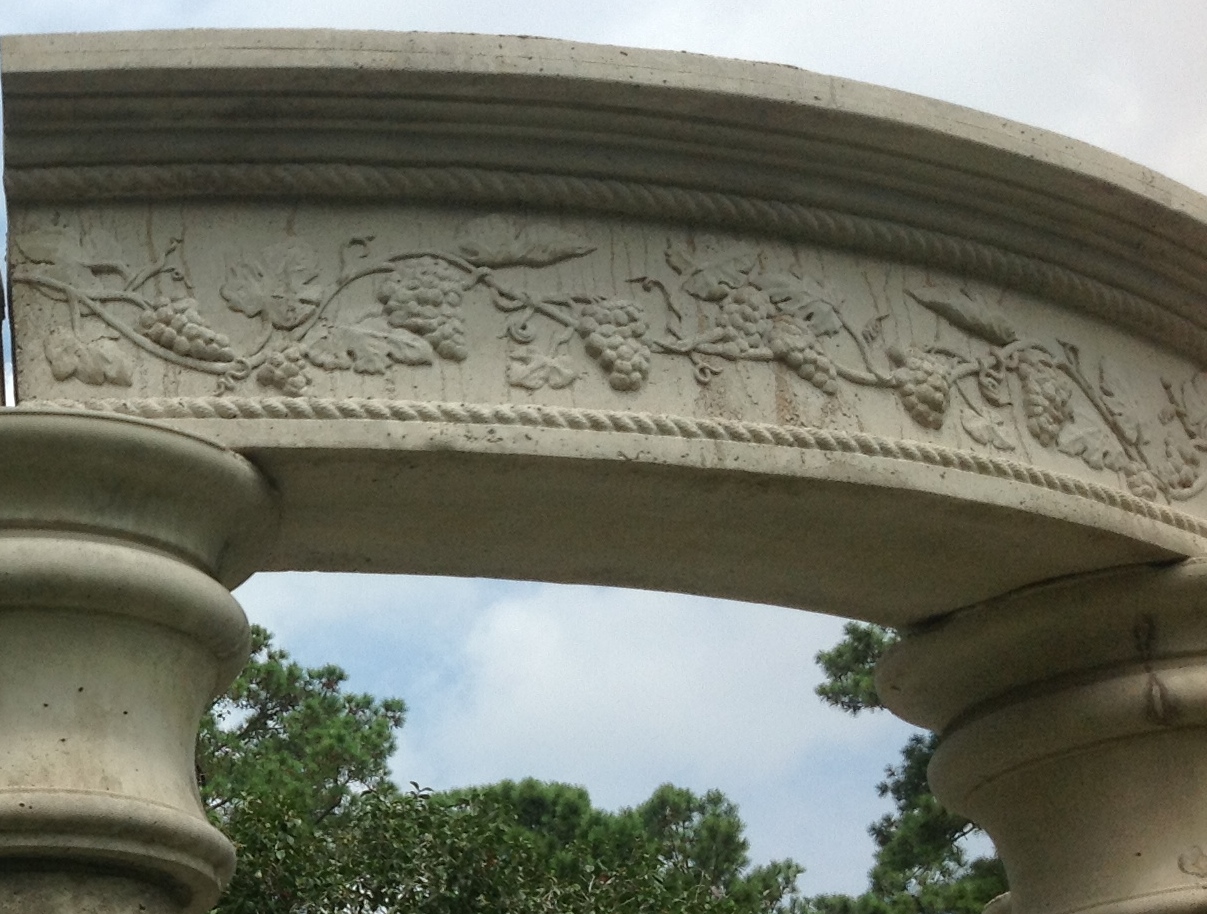
A mold for the header had to be created. We researched and decided to make a latex mold. Fred and his friend John Buzilow built the positive out of wood, 1" nylon rope, and joint compound. Then Joan sculpted the grape vine freeze out of clay and attached it to the face of the header. Coats of a product called "Rebound 25" were applied until a sufficient thickness of latex was achieved. To maintain the shape of the flexible latex, a fiberglass mold was added to that. Finally a box filled with sand was used to support the mold and the weight of the buldging concrete.
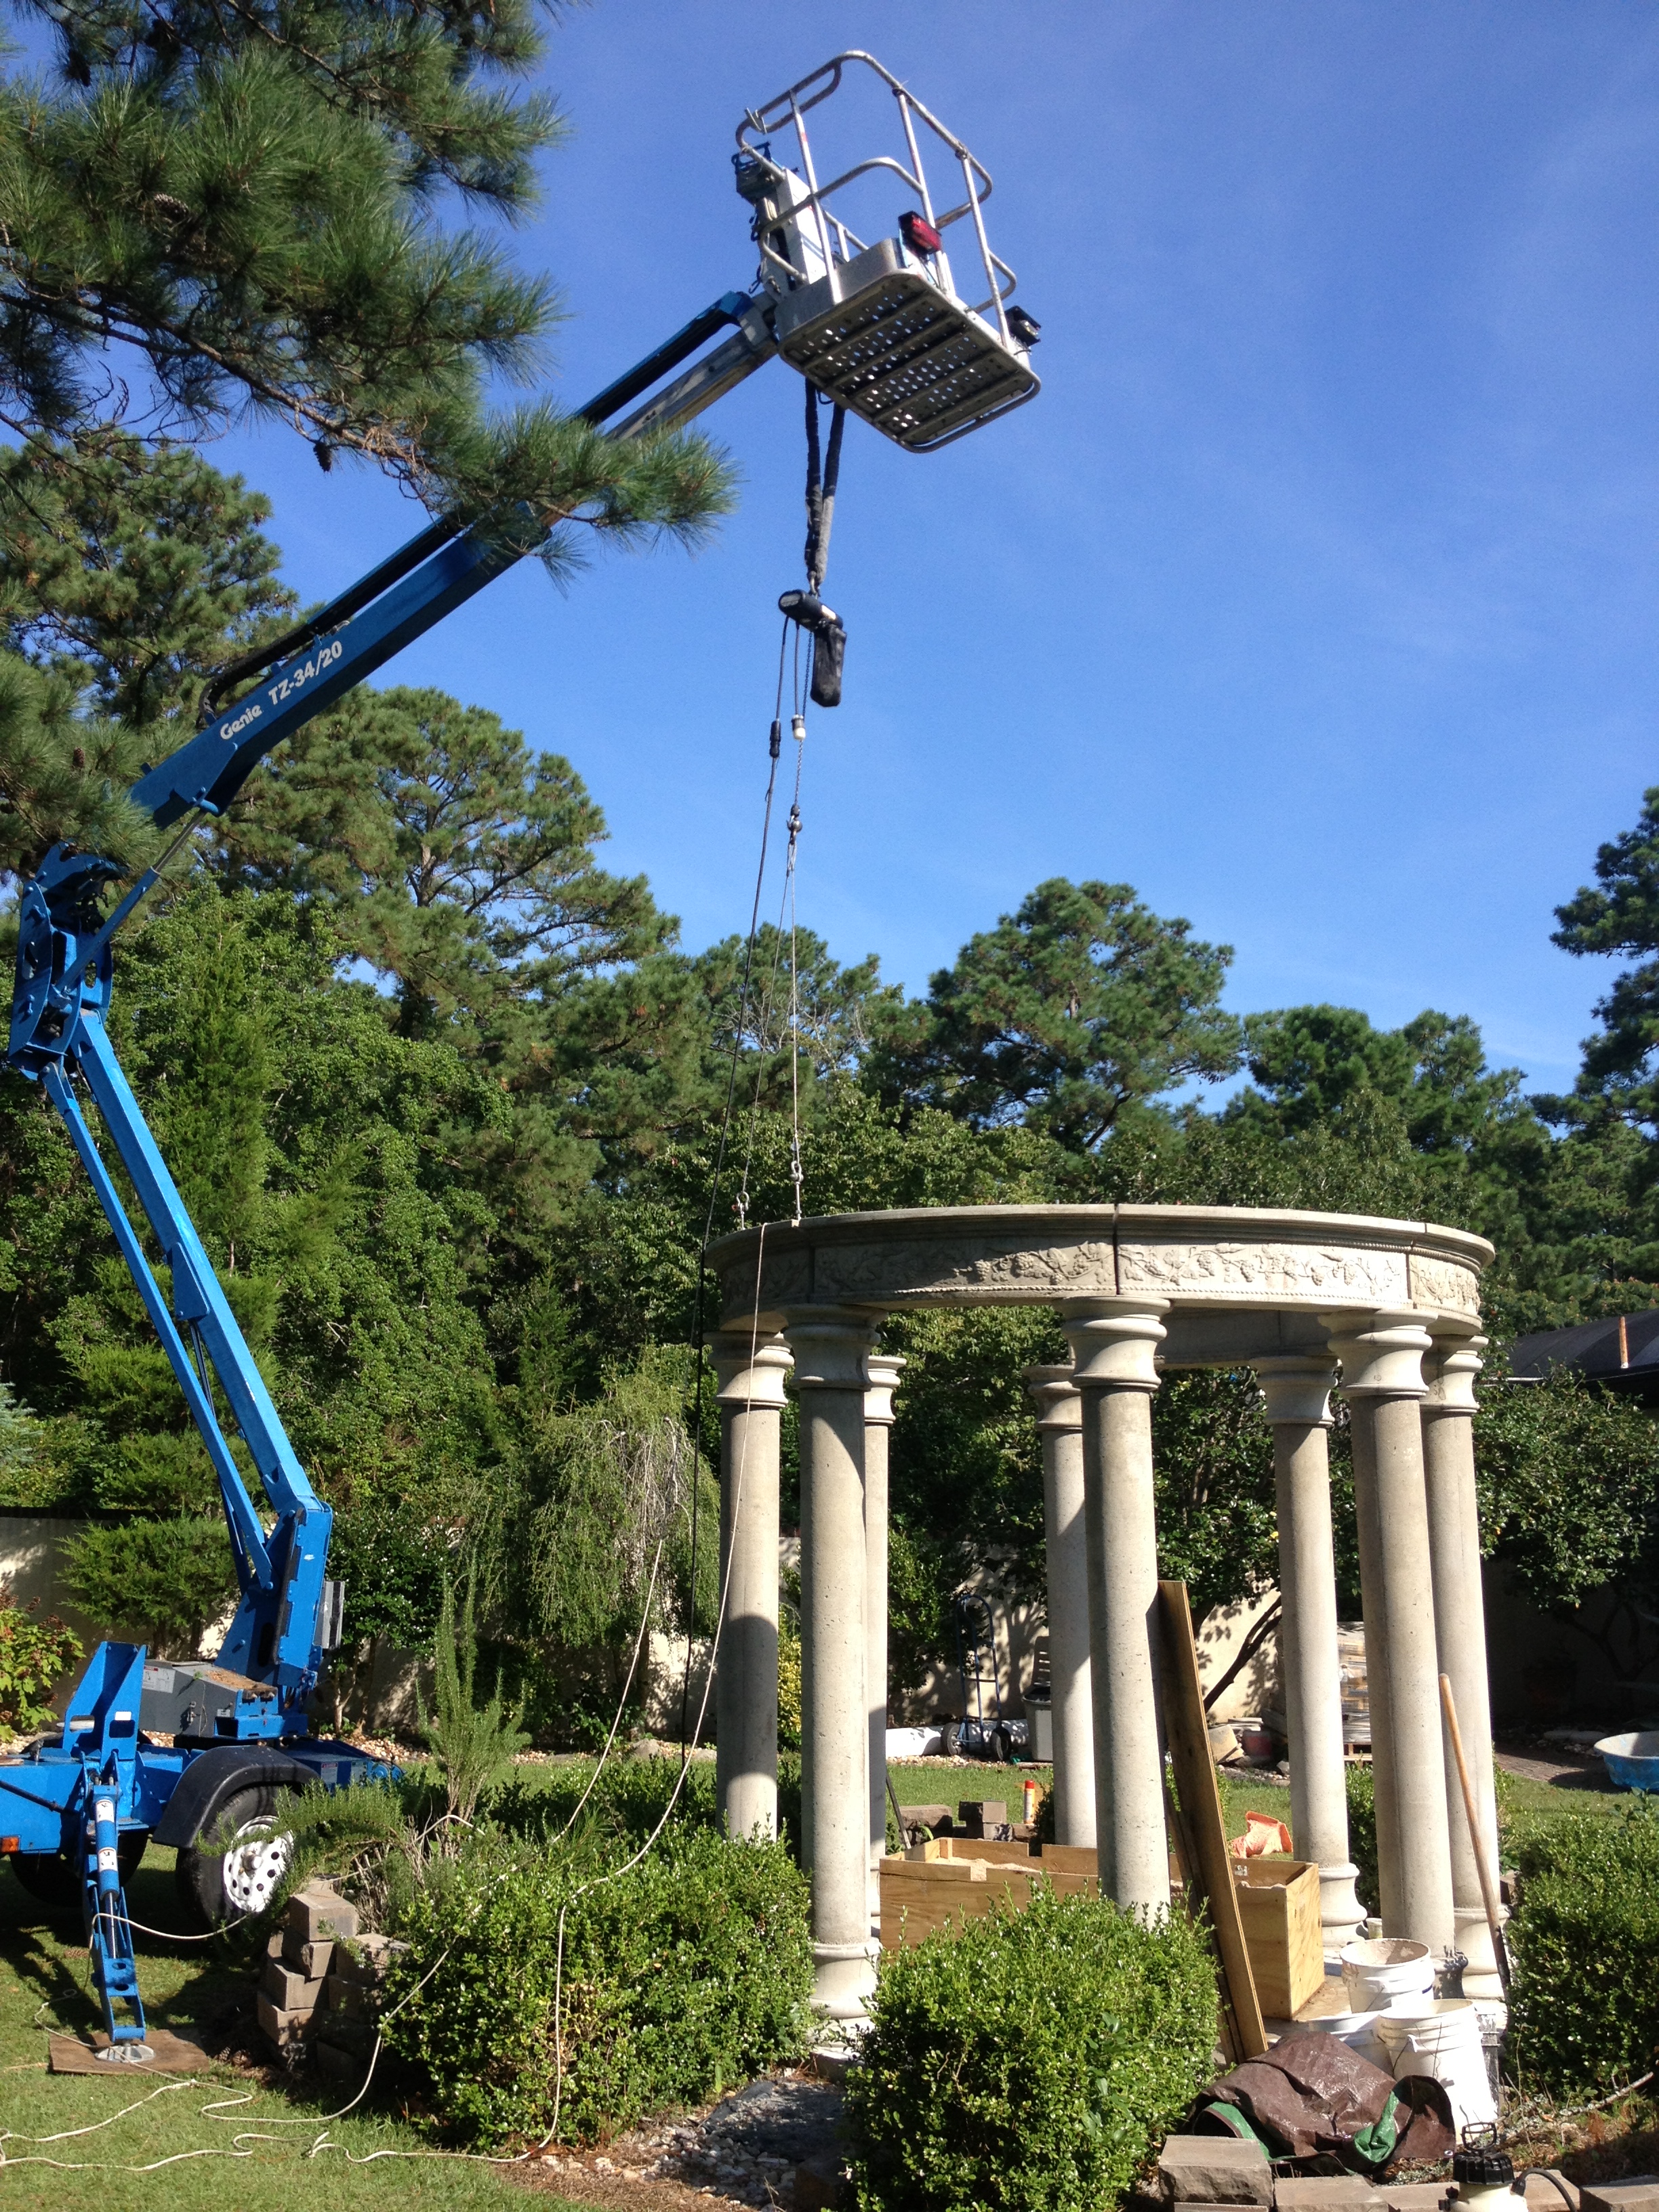
Raising the header from the box
As with the capitals, the headers, which weigh approx. 450lbs., were raised out of the box up to the capitals with the same lift. A 1/4 ton chain hoist was added to the lift providing greater cotrol in placing the header onto the columns. Joani operated the lift while Fred guided the header with ropes into place. This proved to be the greatest challenge of the project.
Lift crane in action
Here you can see the 1/4 ton chain hoist attached to the lift. Once the header was approx. in the right position above, the chain hoist allowed us to gently set the header into place.
Header detail
We were very pleased at the detail that was captured by the latex and transfered to the concrete. It was very important to constantly work the concrete as we poured it into the mold.
Pad and 1st column
Pad poured, all capitals made, and first column in place
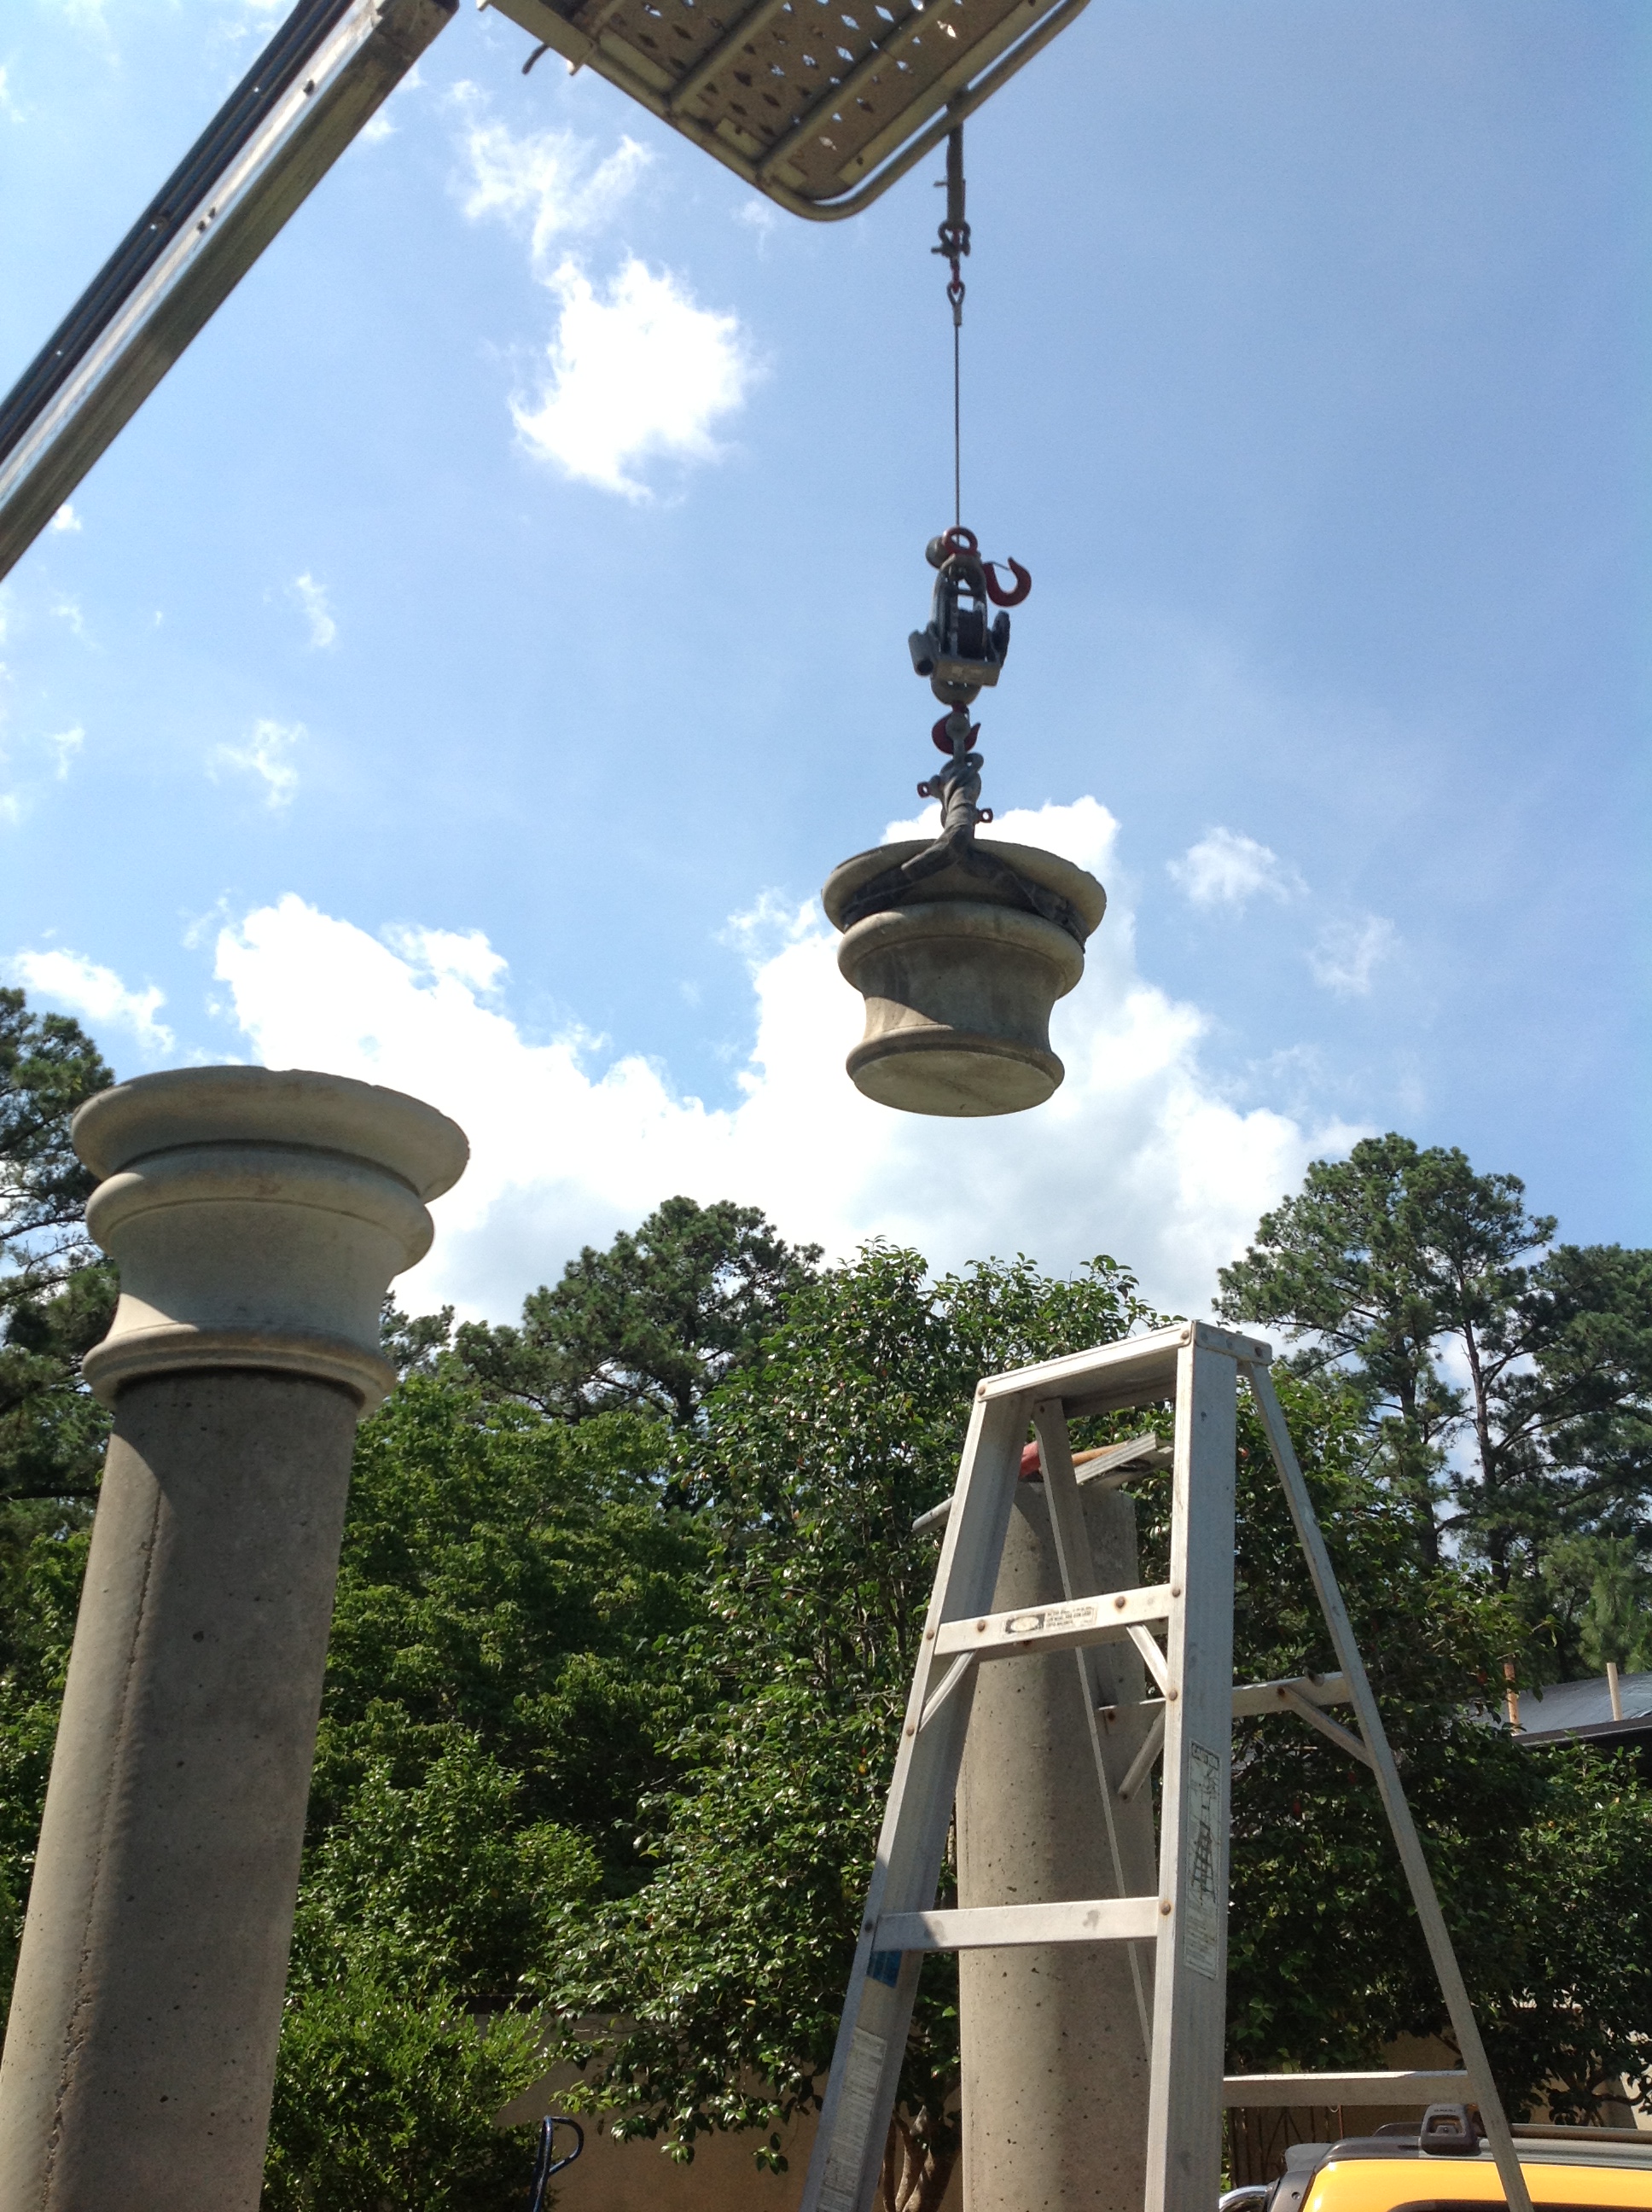
Lifting capitals
Each capital used two bags or 160 lbs of concrete. Lifting them into place was accomplished by using Fred's lift for cutting topiaries as a crane. Each column was buttered with mortar and the capital was set into place paying close attention to centering on the column
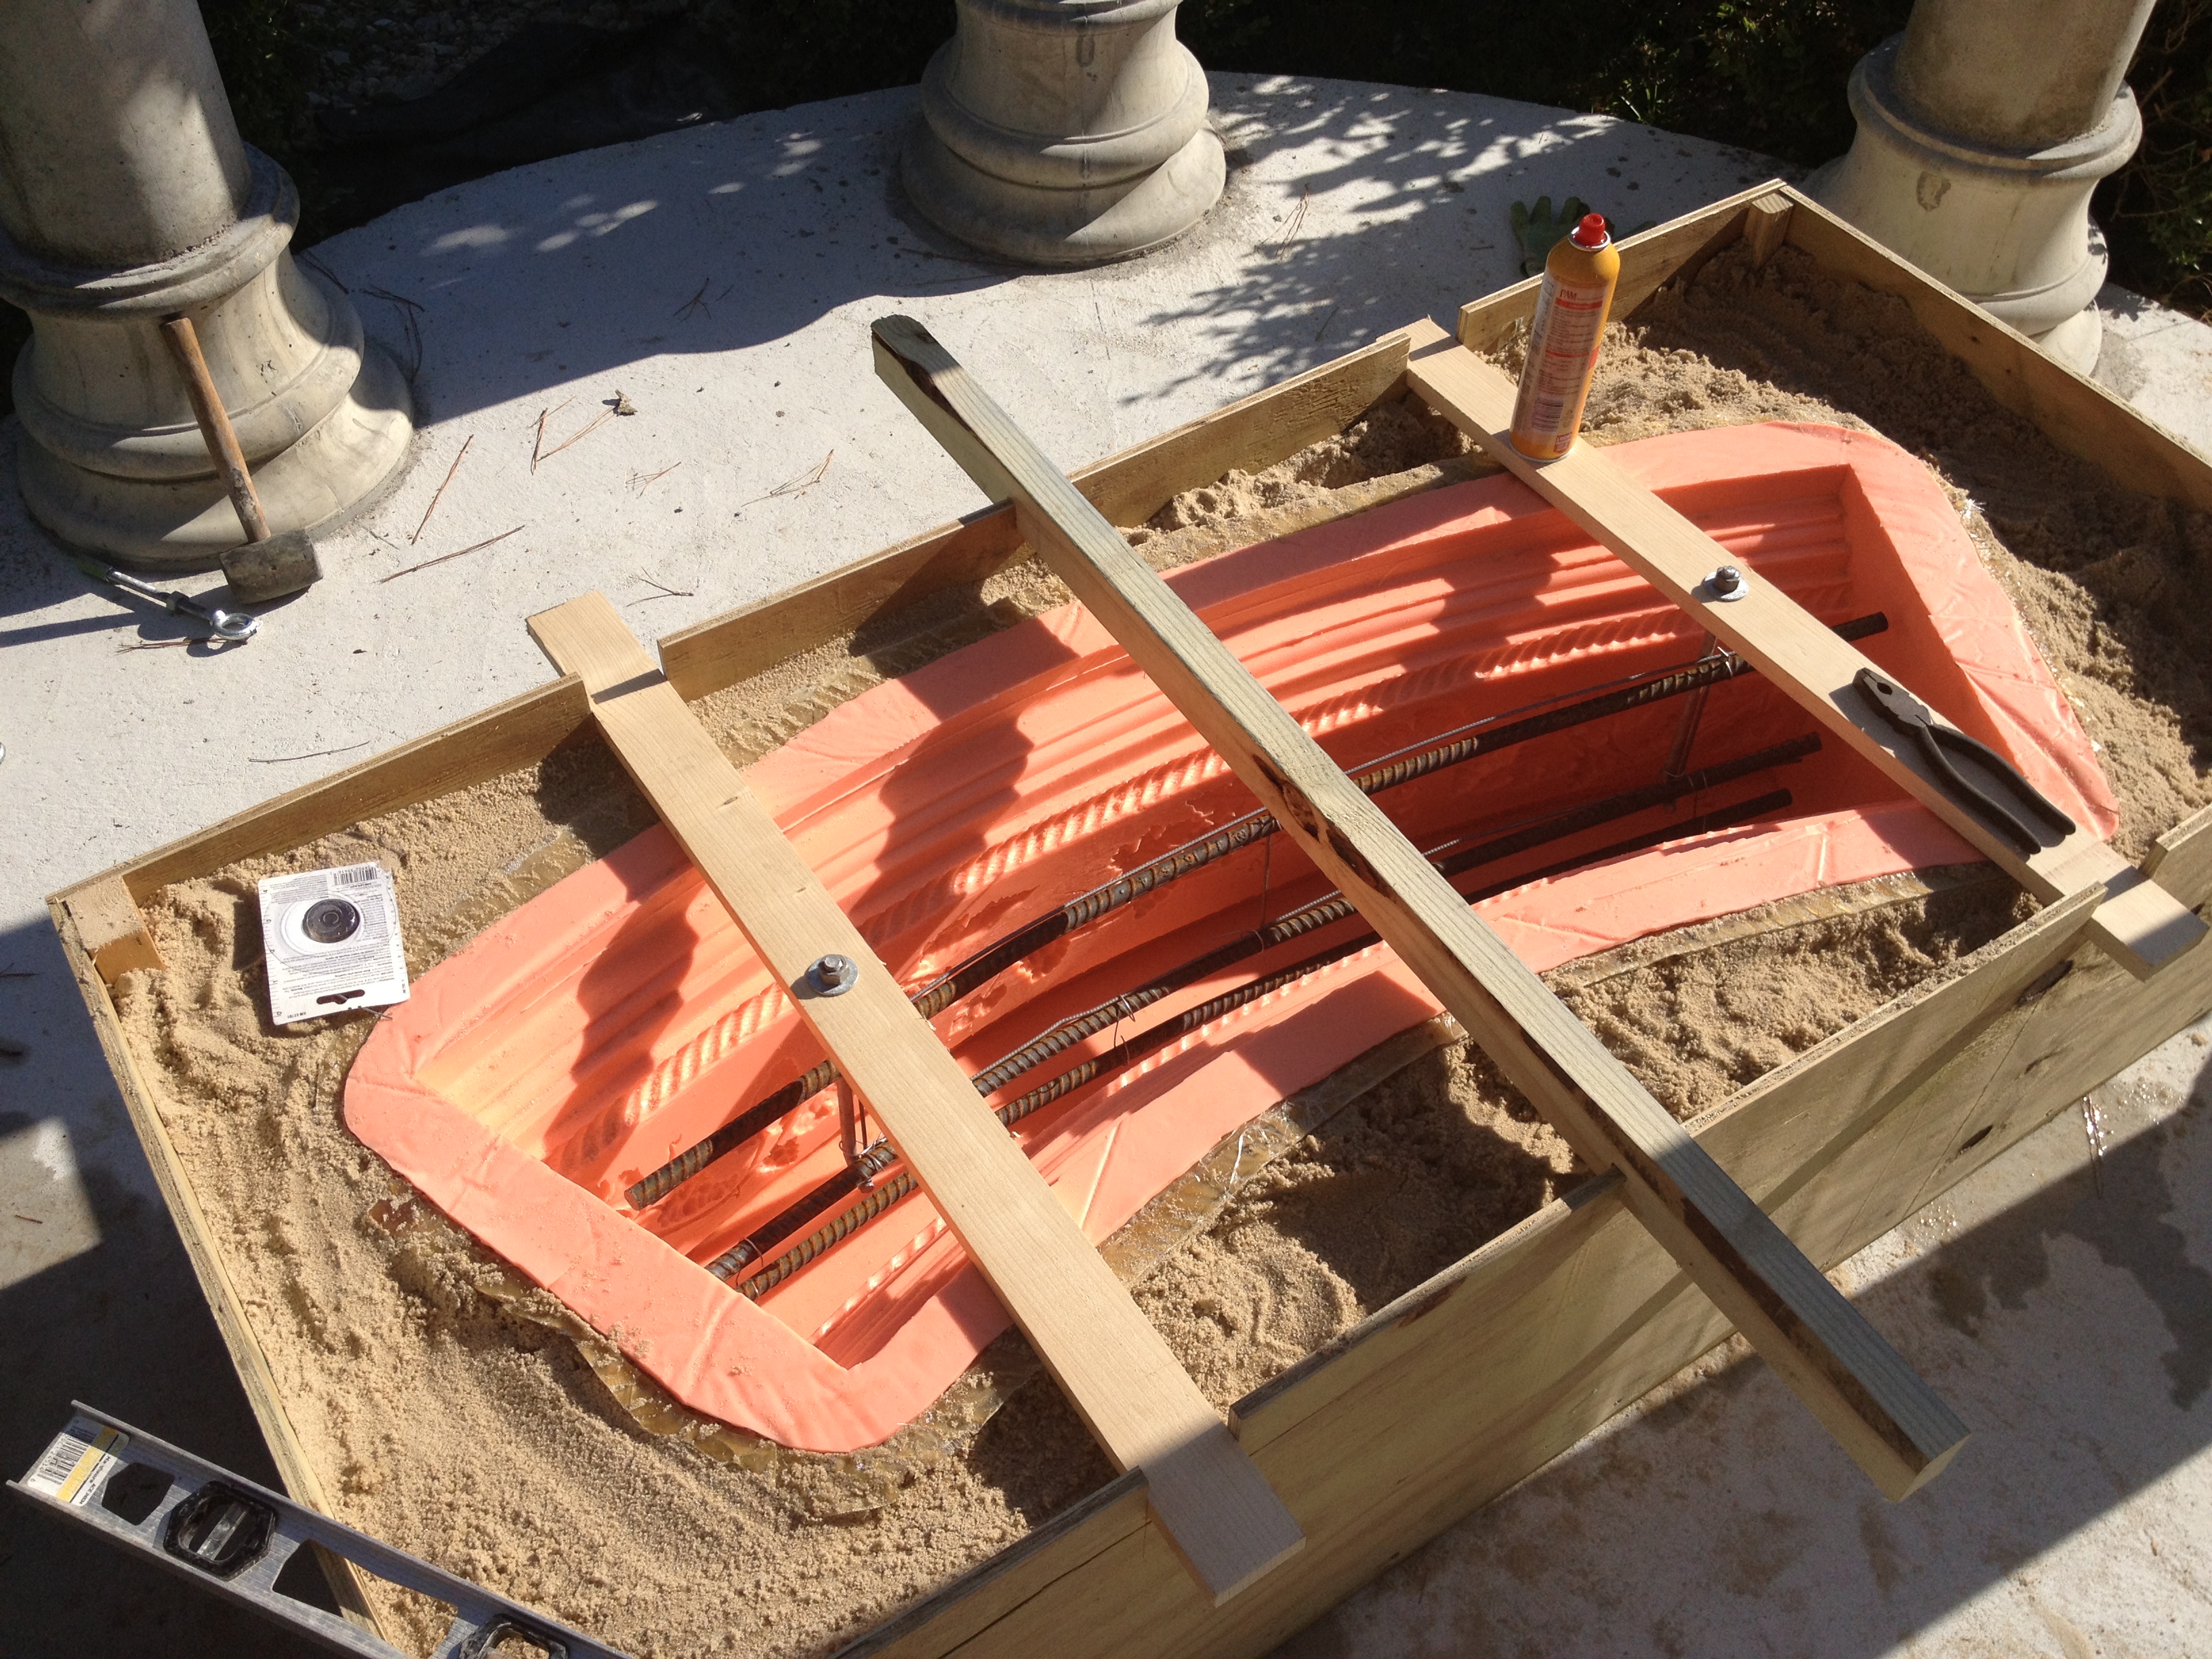
Preparing to pour the header
Once the mold was in the sand-filled box, rebar was placed inside the mold for horizontal span support. The boards on top of the box were used to support the position of the rebar by means of threaded bolts which would later be used as the connecting point for attaching steel slings and shackles for lifting the header. Once in place, these same bolts will be used to secure the copper dome to the headers.
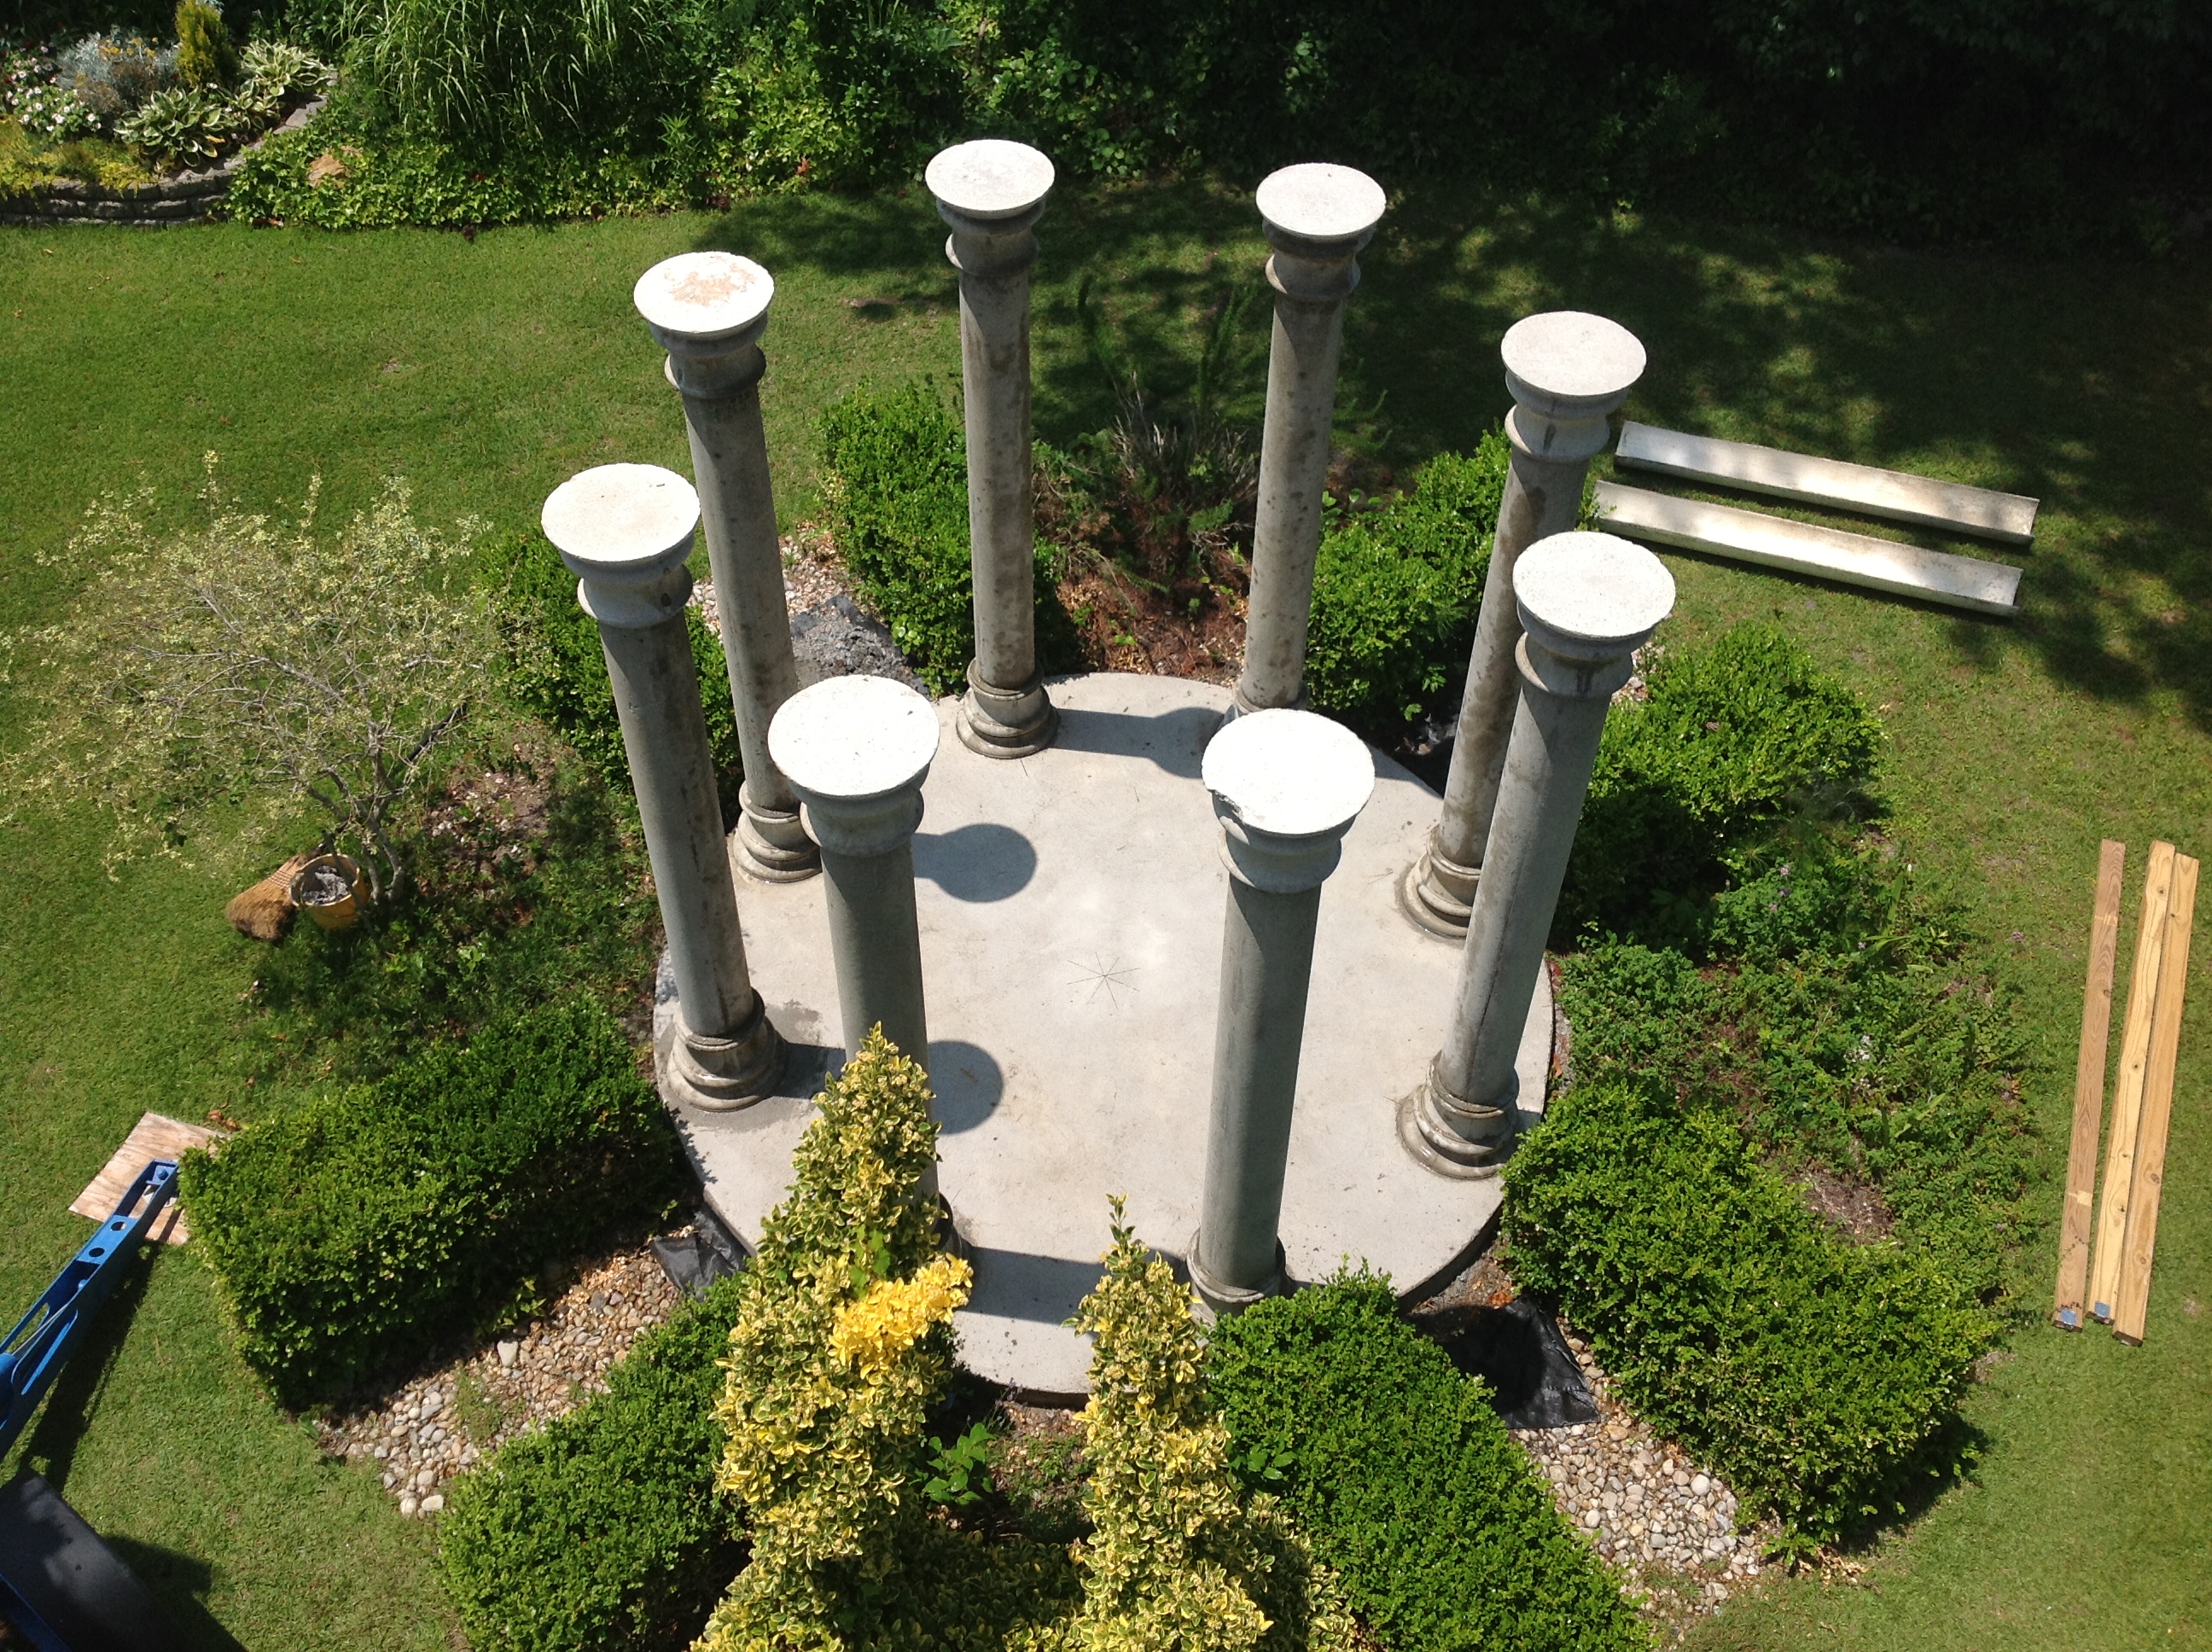
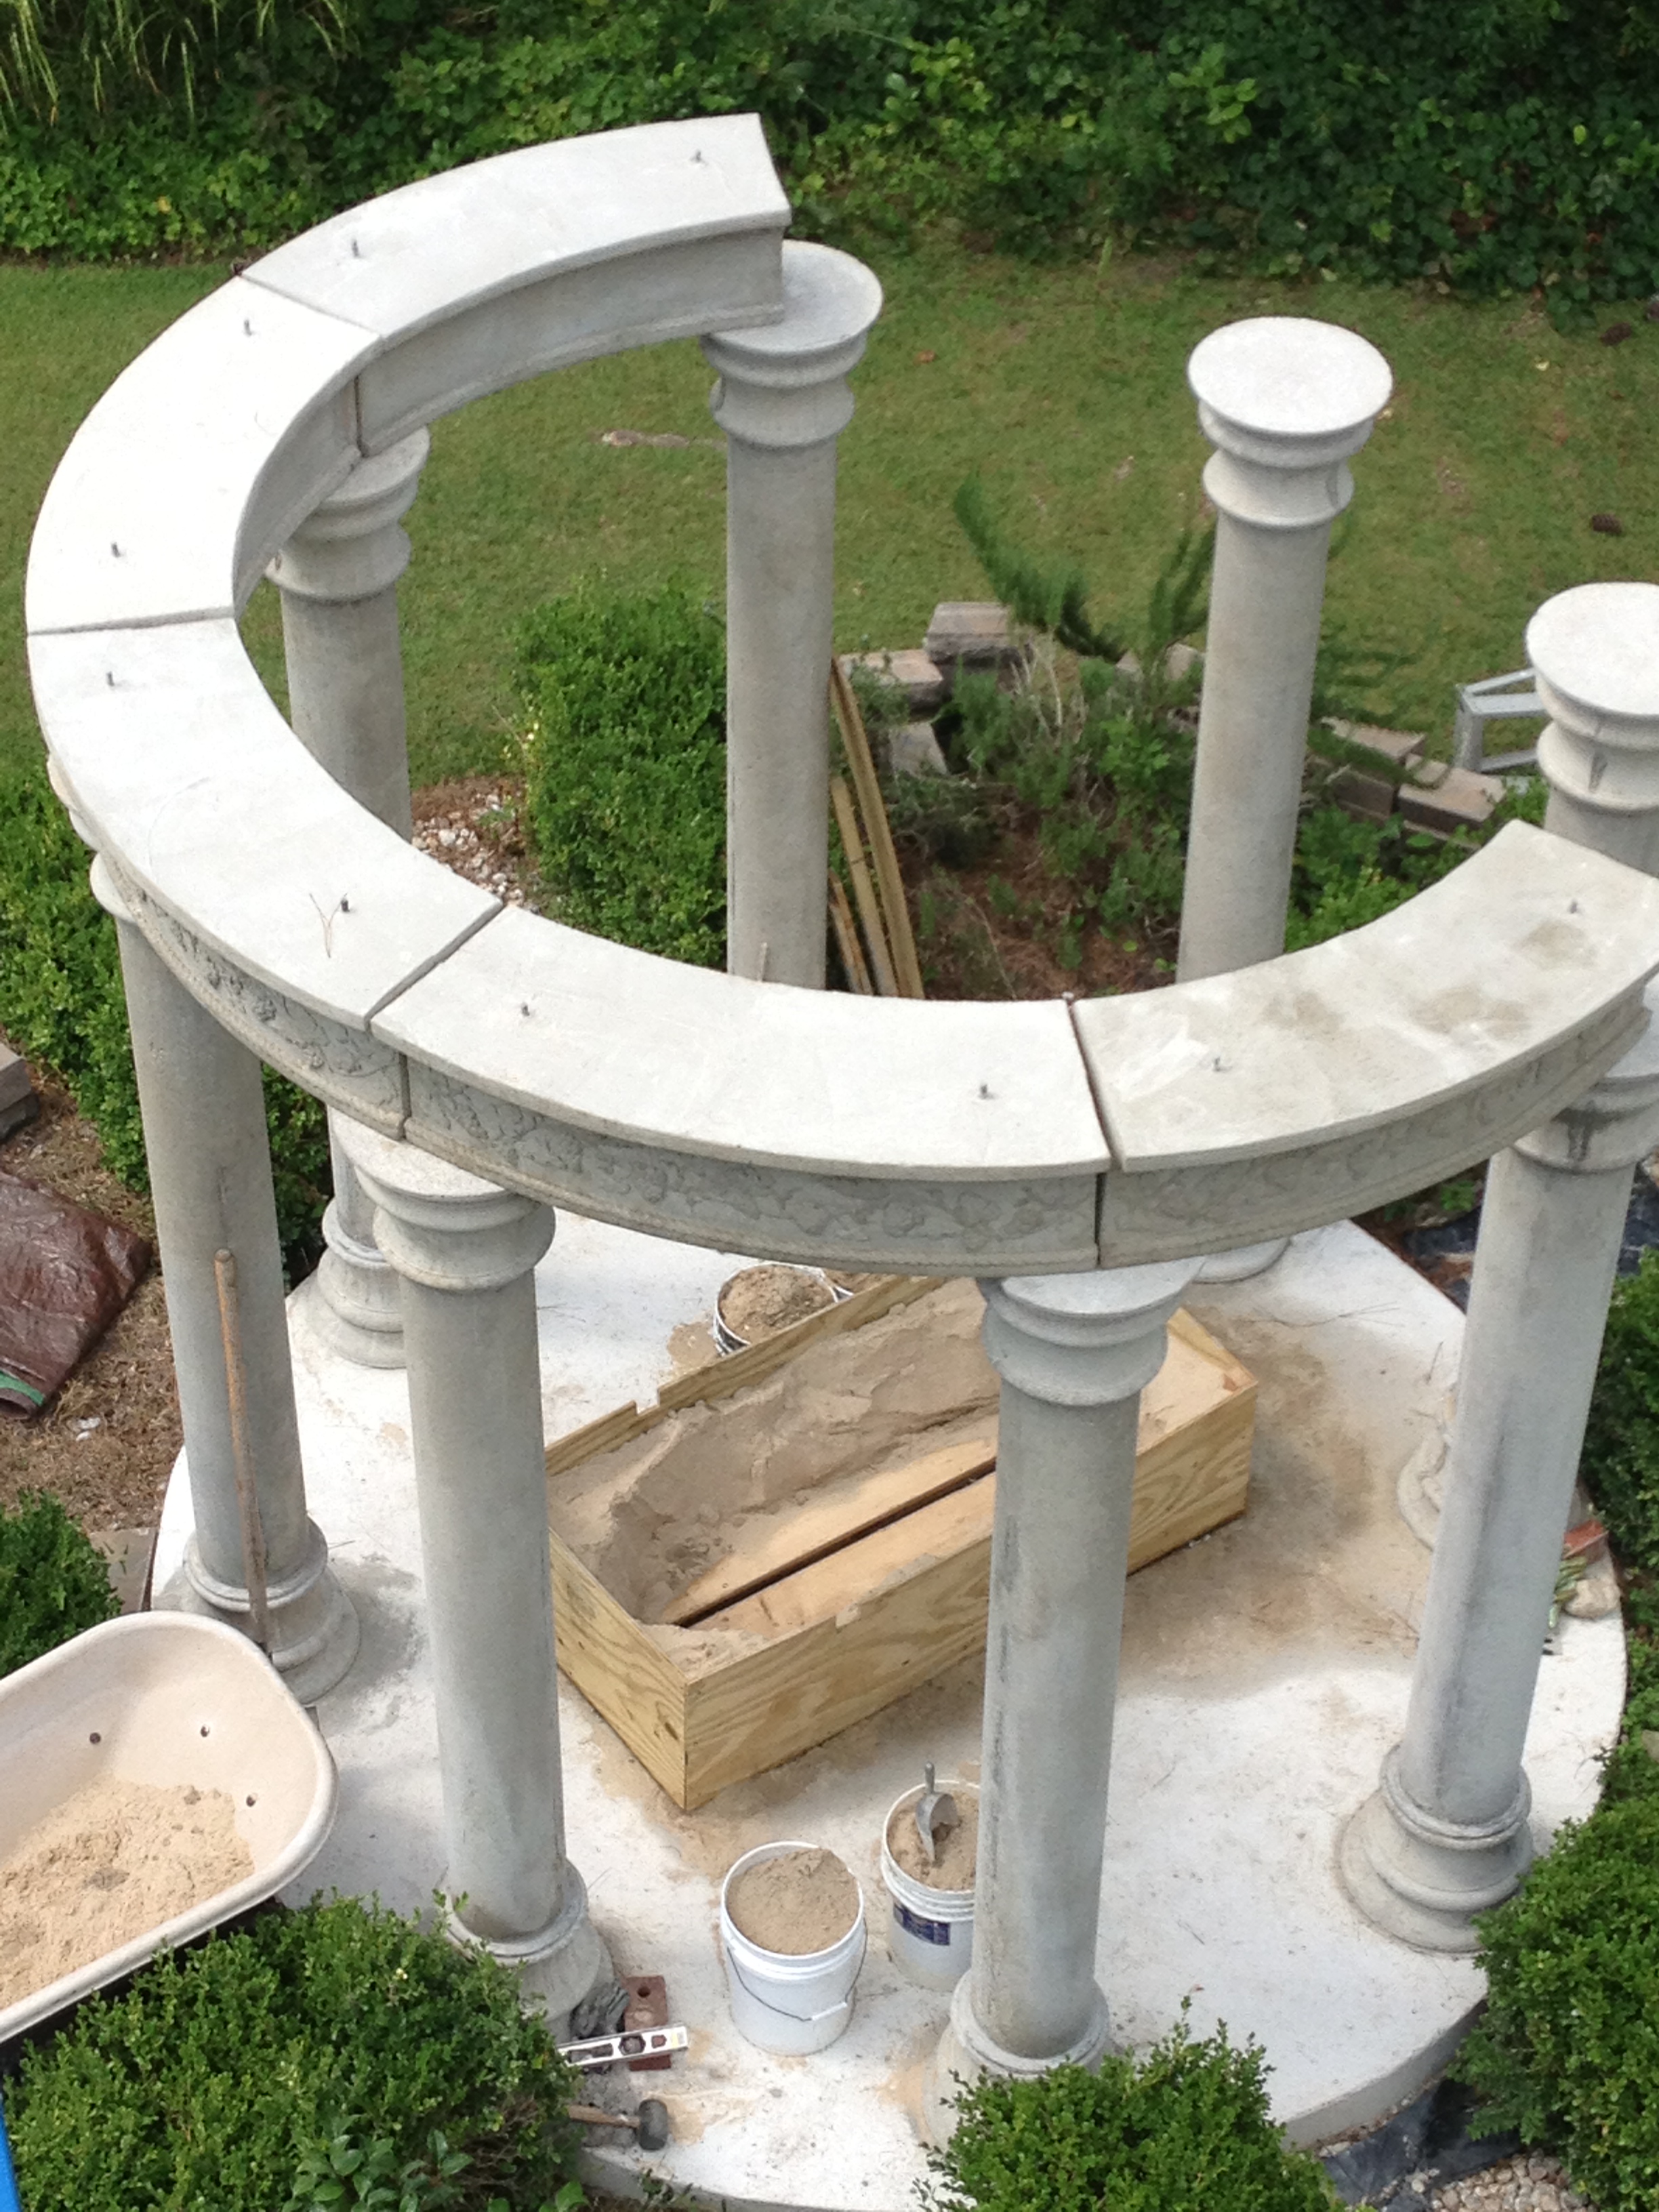
A fun arial shot
Taken from the lift, this was an interesting view of just the columns before adding the headers.
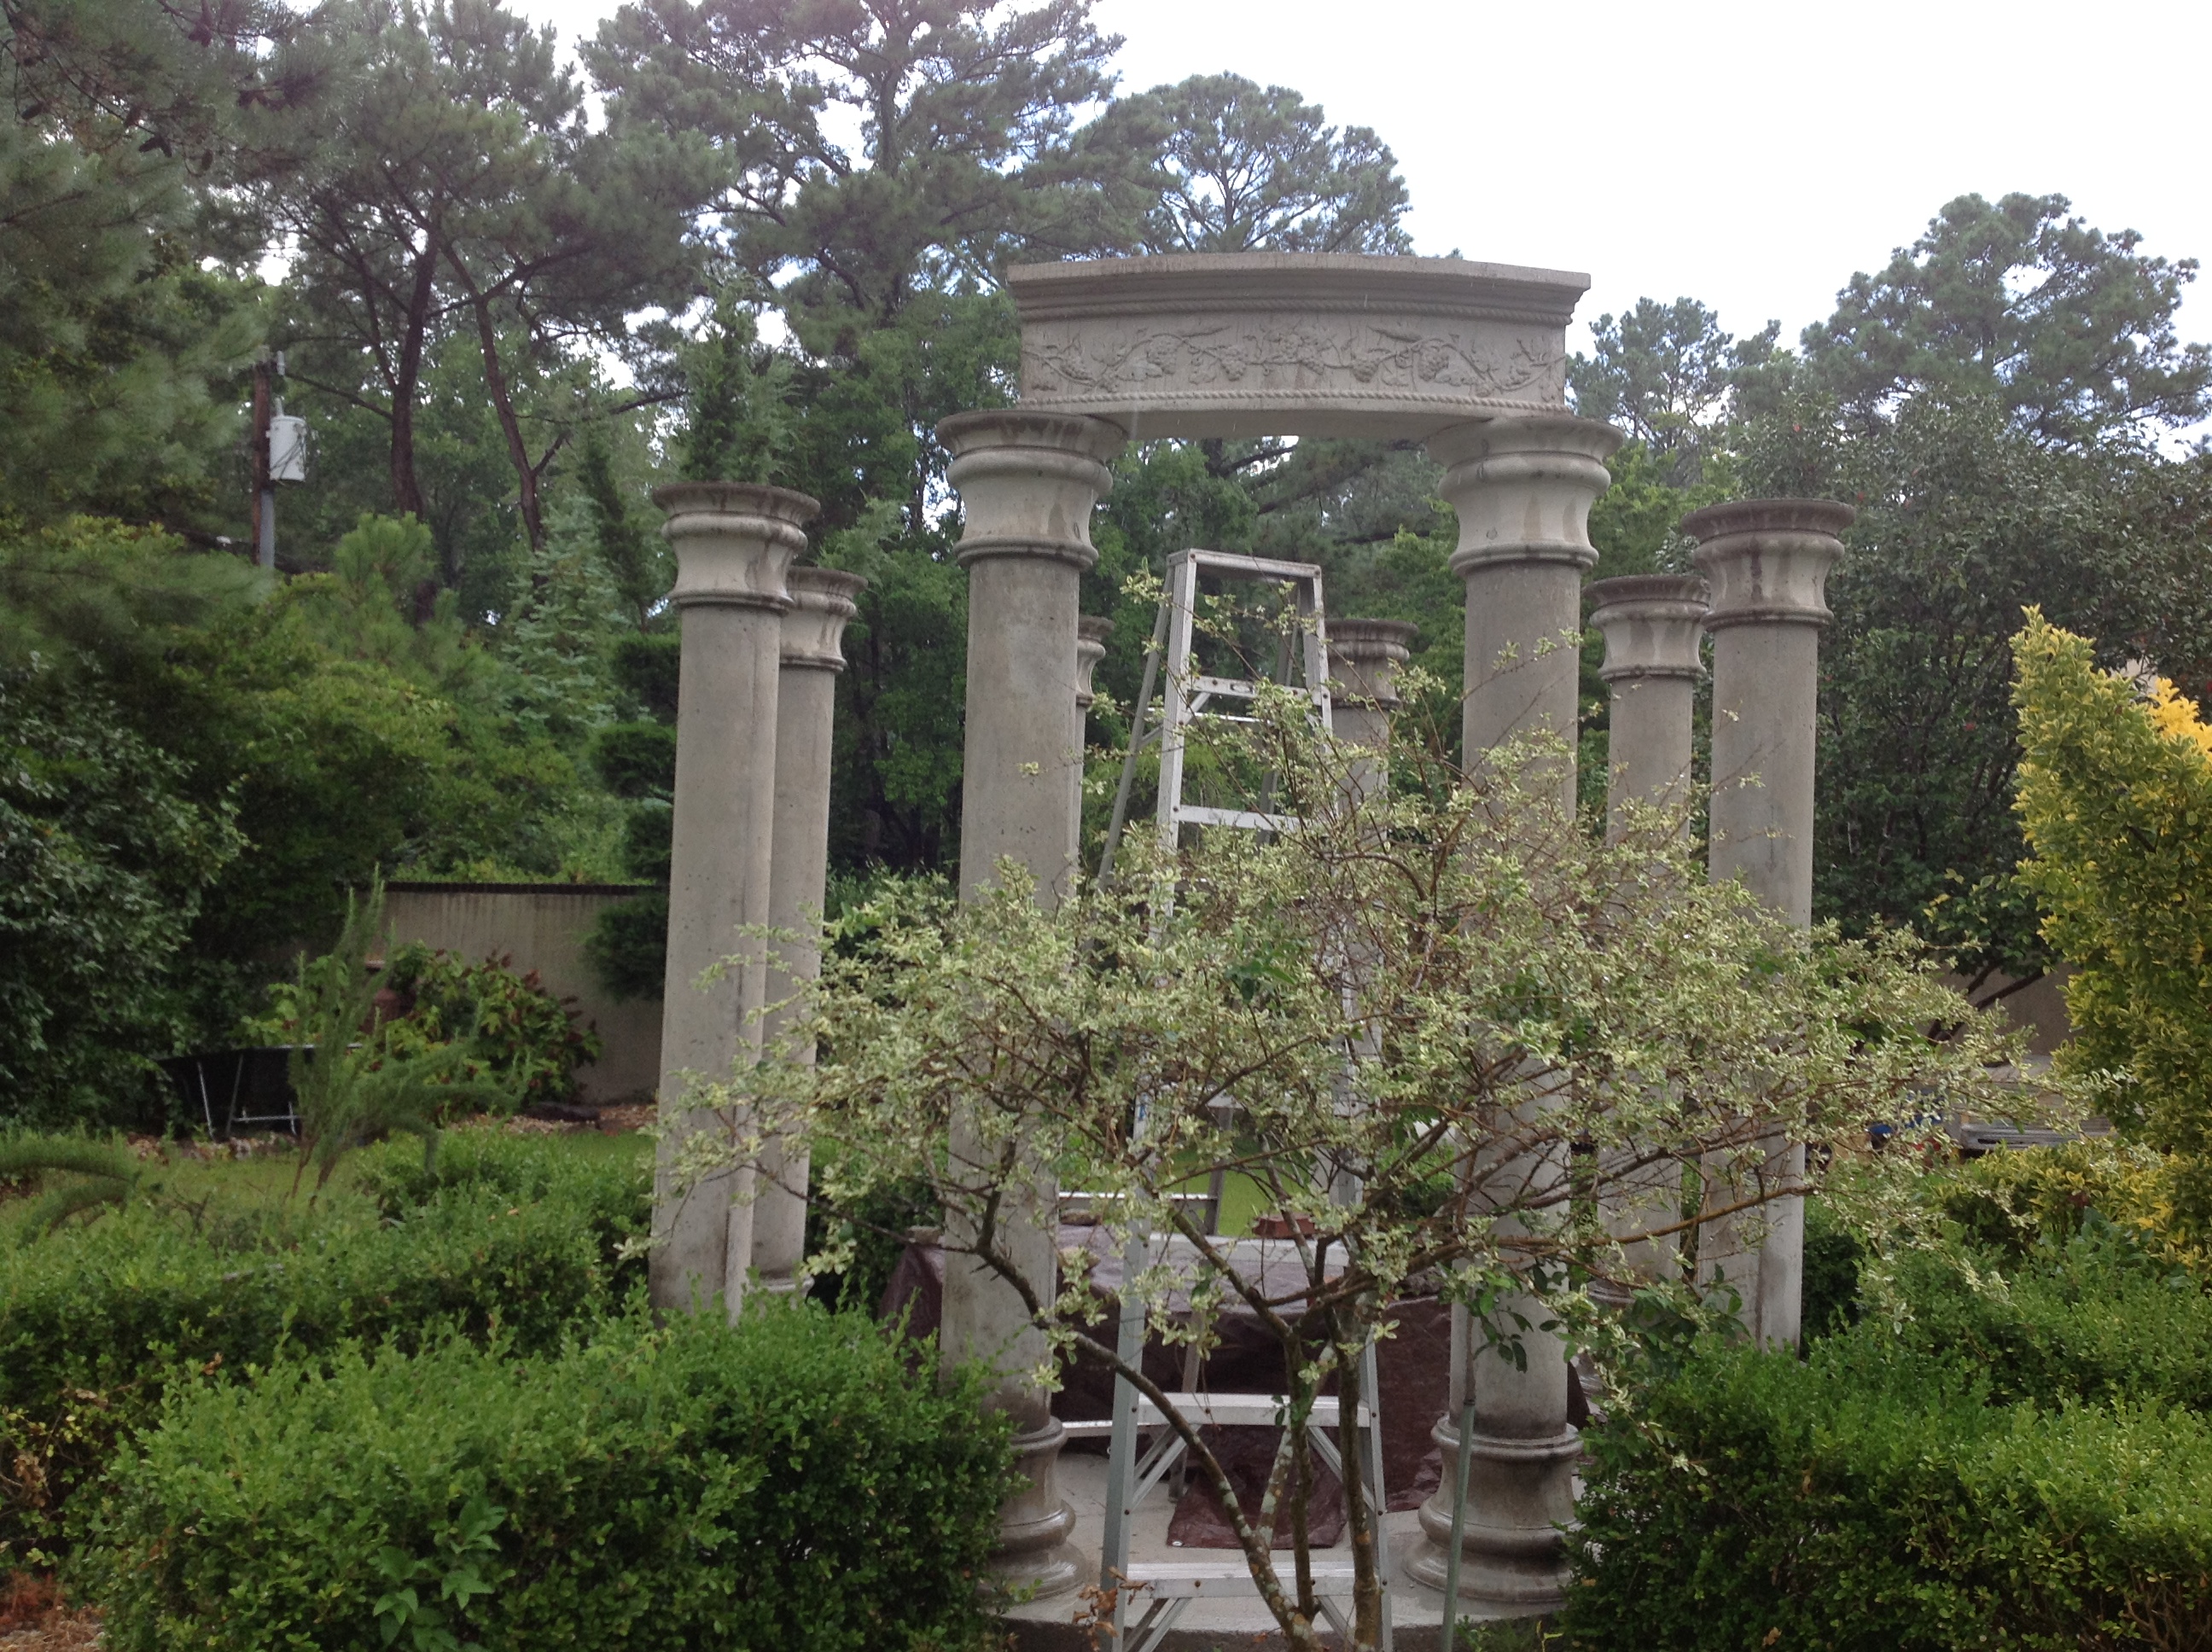
The first header placed
We were really excited to get the first header into place. The gazebo was becoming a reality. Having started the project in May of 2013, it was now July and we were really beginning to roll!
Another arial shot
Another interesting view from above. The headers were made in the center of the gazebo so that they could be close to where they had to finally sit. Not sure how we would have moved them otherwise. We don't have a forklift! As a side note, the 200 bags of 80lb. concrete which were used for this project were brought and placed in this side of our garden by our supplier who forklifted pallets of 42 bags on four different occasions.
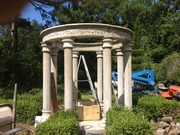
September 18, 2013
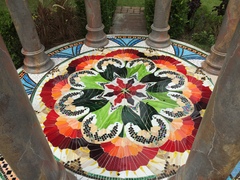
In August of 2015 we finally got around to the next phases of completing the gazebo. Joani had been working on the glass mosaic floor in her studio for 6 months and now it was time to lay it. However, we had to feaux paint the columns as marble first. We chose colors that would eventually blend with the aged cooper of the dome, but that phase will be coming hopefully in January of 2016. Joani had prepared 8 pie sections of the glass design which was created like looking through a kaleidoscope. The glass was attached to a net impregnated with hot glue so that you could hit it with a heat gun and they would adhere. Well it kind of worked? We had to move the pie sections from her studio and reassemble them on the floor to be sure they would fit. Joani is very good at figuring all this out. And they did except for a few small modifications. Then we had to lift each section to apply the thin set concrete and lay it back down in the exact right location. Painting the columns took and entire weekend, and then setting the floor took another! It turned out pretty good! By the summer of 2016 the dome should be in place and the gazebo will be one more completed project! And then on to the next one?????
The completed gazebo